On this page
Customize a text message with HTML and CSS
Customize a text message HTML tags and inline CSS styles
You can customize any RWC message built with a Text component by using HTML tags and inline CSS styles right in the Text Massage field in one of the Steps:
- Send Message (RWC)
- Request Response (RWC)
- Request Web Form Response (RWC)
- Change or Delete Message (RWC) in the Change mode
Instruction
- In the Step, the Text Massage field, write the message with inline CSS styles and HTML tags. For example, to add formatting, images, and a link, add the following code to the Text Massage field:
html
<b>bold text</b>
<a href="URL">link</a>
<div style="display: flex;">
  <img src="link to image" style="width: 50%;">
  <img src="link to image" style="width: 50%;">
</div><b>bold text</b>
<a href="URL">link</a>
<div style="display: flex;">
<img src="link to image" style="width: 50%;">
<img src="link to image" style="width: 50%;">
</div>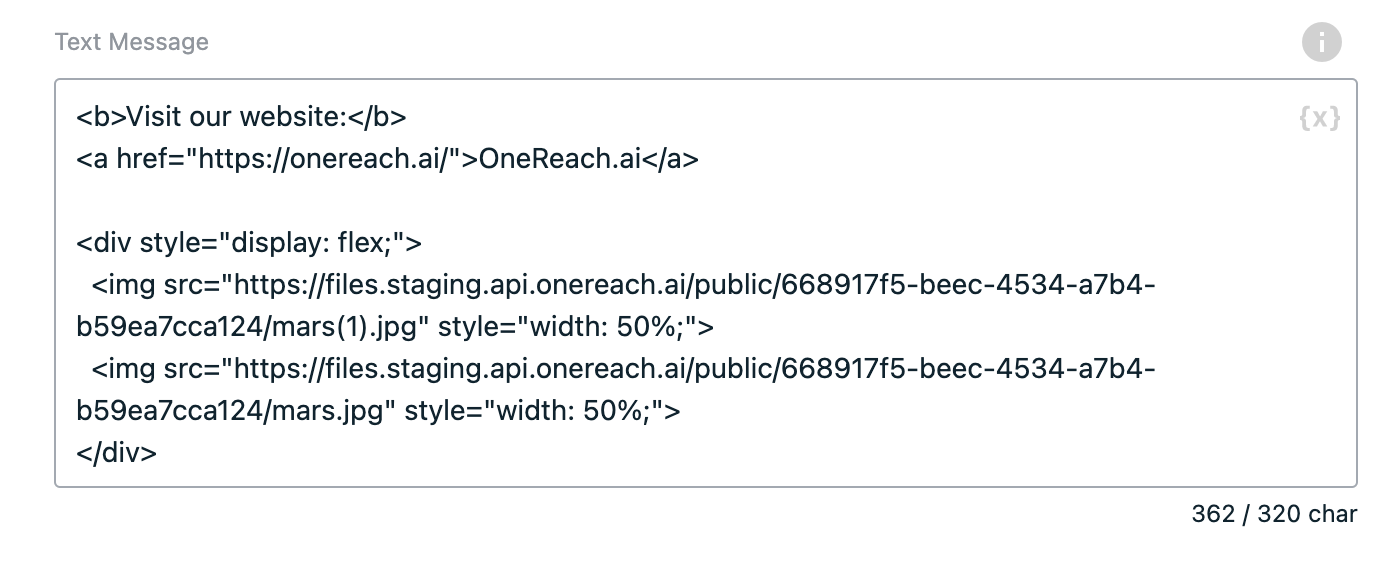 2. Save & Activate the Flow.
Result
In the chat, the text of the message is parsed as HTML 
WARNING
In the Text field of the Step, don't write any other CSS except inline, it will not be parsed. No JavaScript code will be executed as well.
Customize a message with classes
To use classes for message HTML, Use custom CSS in the Wait for Chat(RWC) Step of your Flow.
Customize a message with JavaScript code and CSS
To execute your JavaScript code or write more than just inline CSS, use the Custom template input component.
Instruction
- In the Request Response (RWC) Step, select the Custom template input component.
- In the Custom template type, select HTML.
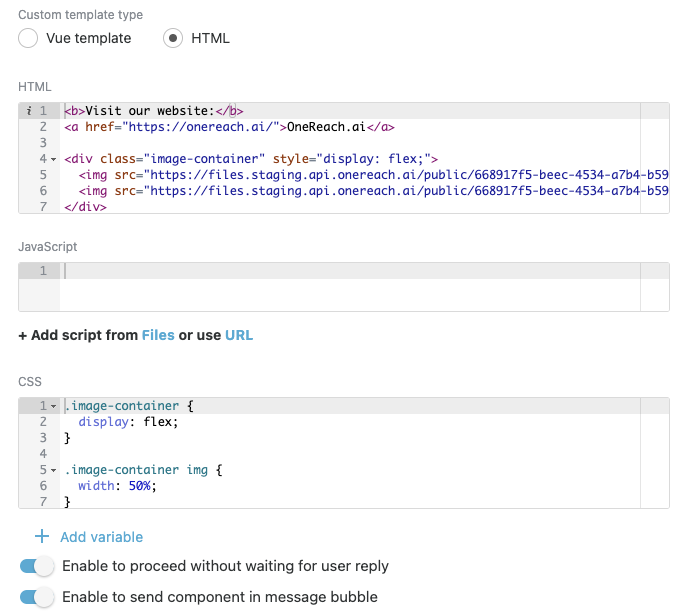
- Add the your HTML and CSS. Also, JavaScript if needed.
- If you enable the Proceed without waiting for user reply toggle, the message will be submitted once it is shown in chat without waiting for the user reply. This toggle activation makes the Request Response (RWC) Step behavior similar to Send message (RWC).
- Click Publish template.
- Use the created template in the Request Response (RWC) Step.
- Save & Activate the Flow.
Result