On this page
Wait for Chat (RWC)
Read the overview on what to use the Step for in the Set the scene for chat building article.
It is a gateway Step for the RWC product. Always start building your chat with this Step and continue building the RWC Flow tree using other RWC Steps. Wait for Chat (RWC) starts a Rich Web Chat conversation. Use it to set up the Chat ID and RWC appearance. When the user opens the app or chat URL, the Flow proceeds down to the next leg of this Step.
General settings
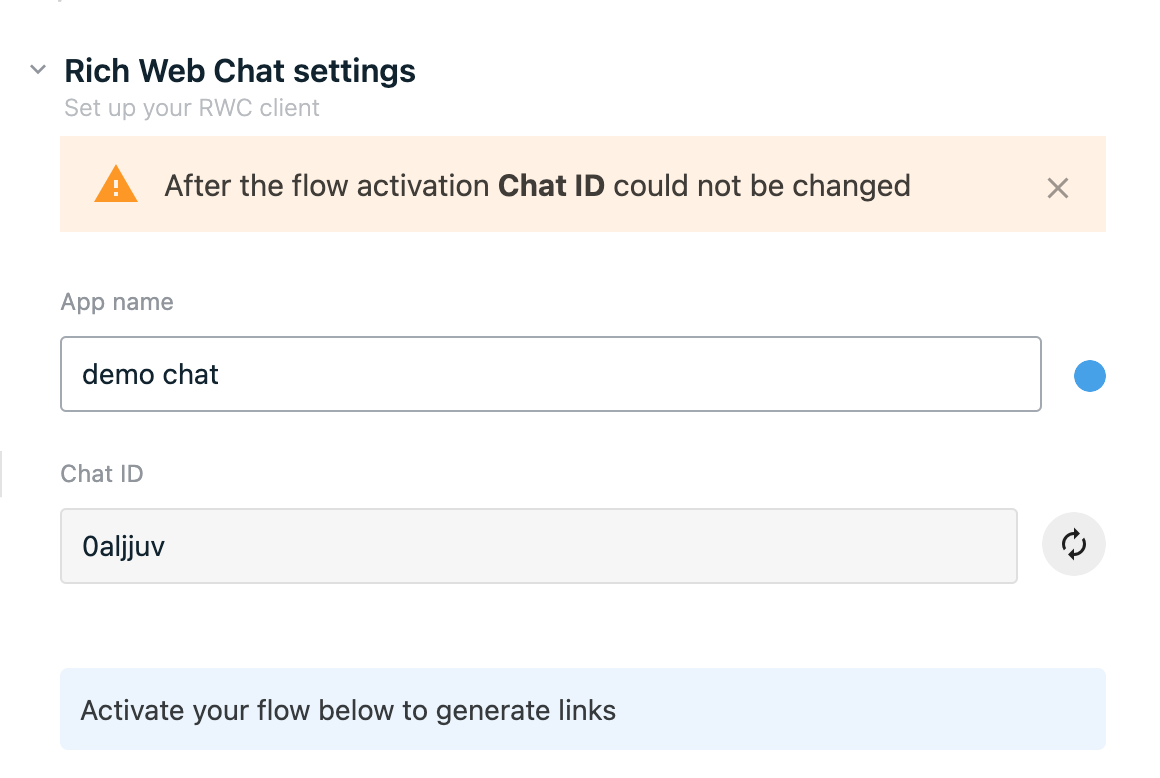
App name is the name of the chat in your OneReach.ai App. and is required for chat setup. However, after Flow activation, the chat can be launched both in app and browser views. Its value is limited by 100 characters and isn't required to be unique.
App color can be selected from the palette and will be shown in the OneReach.ai App for your chat.
Chat ID is part of the RWC URL. It must be unique throughout your OneReach.ai account. This value is generated automatically when the Step is added to the Flow tree. It is limited to 100 characters and cannot include spaces or any special characters except :^~?<>|&%.'#[]+=„"{}. If you want to generate a new chat ID, click on a button right next to the chat ID field. Chat ID value cannot be changed after the first Flow activation.
TIP
Make sure the App name and Chat ID fields are filled. Otherwise, Flow saving and activation will fail.
Once the Flow is activated:
- RWC URL is generated
- Option to copy the App URL and RWC URL becomes available
- Option to open the App URL and RWC URL in a new window becomes available
| Before activation | After activation |
|---|---|
 | 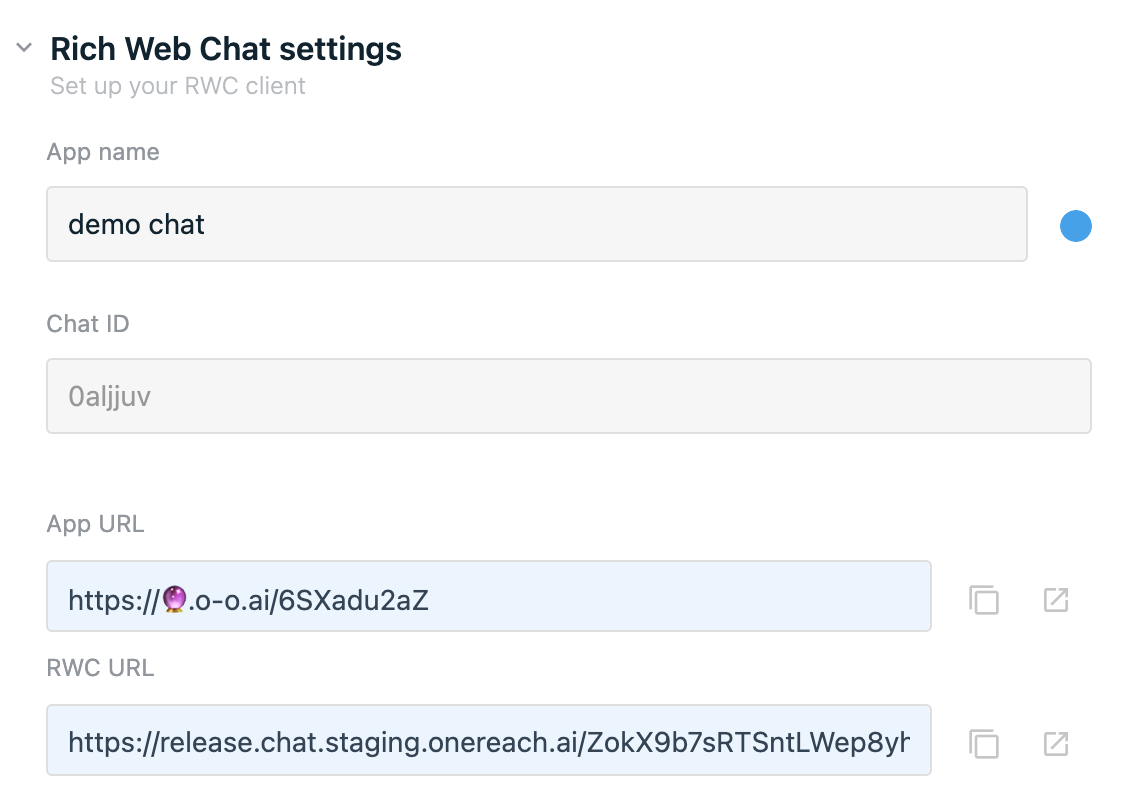 |
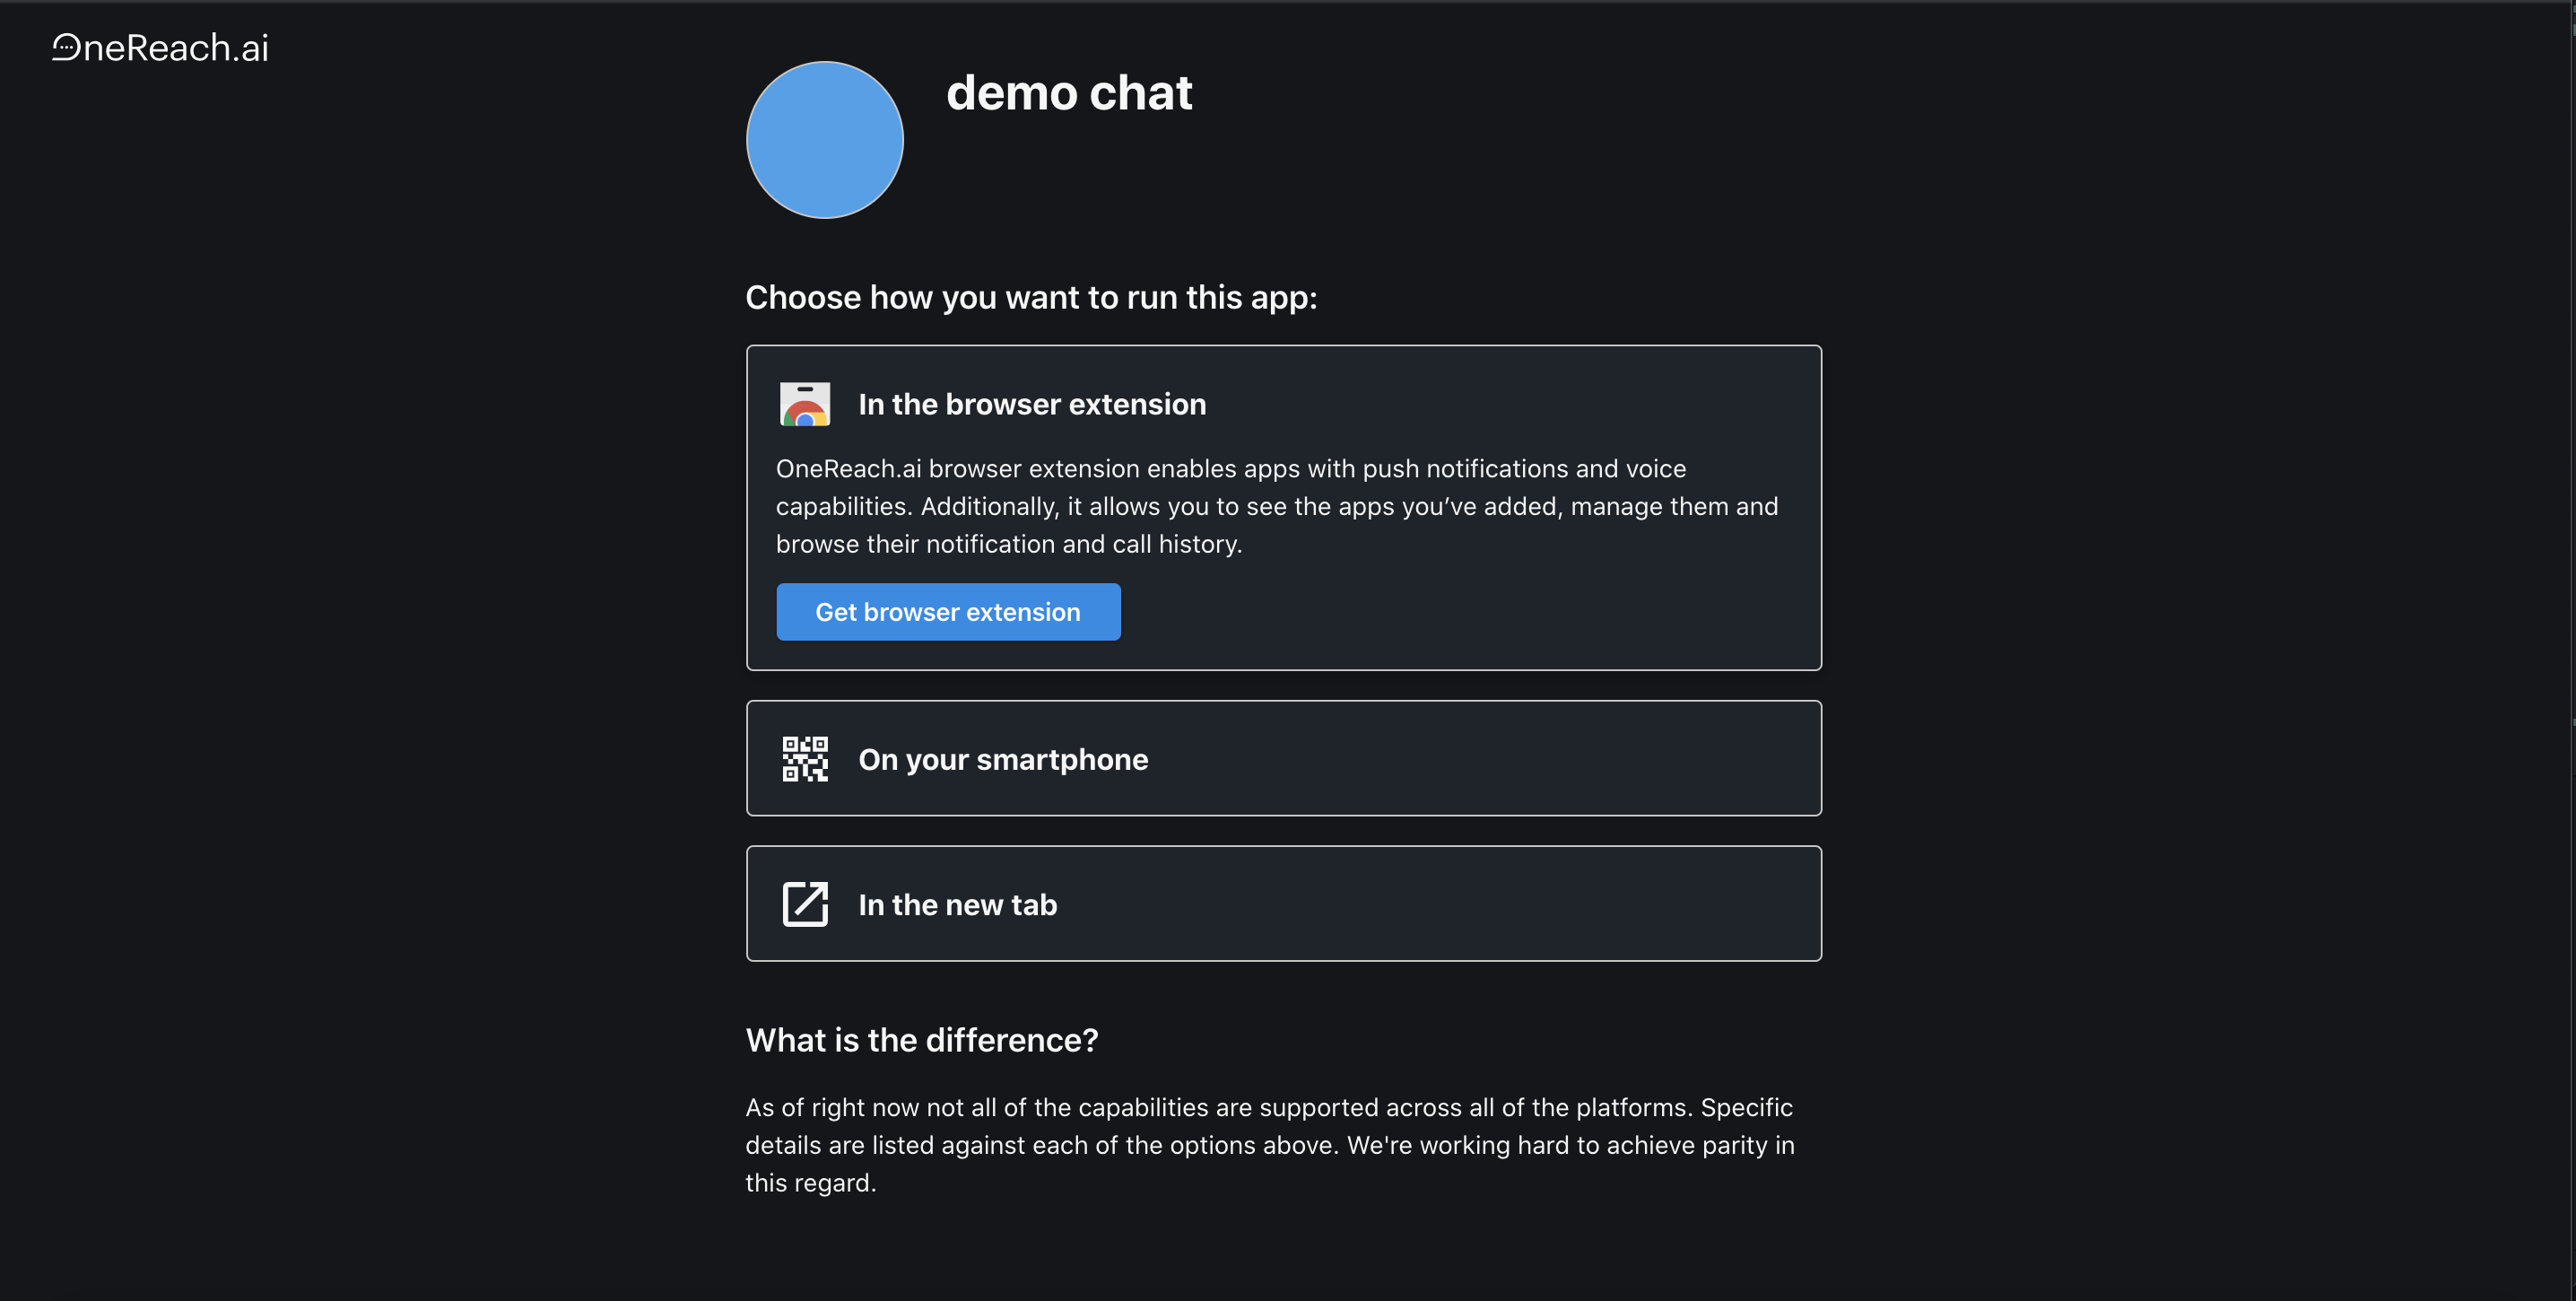
The QR code that contains the App URL is also generated and leads to the OneReach.ai App landing page, where the chat user can choose a browser or app view for the chat.
Look and feel
This section serves to customize the UX/UI of the chat. However, some UX/UI settings for pro-users are in the Advanced settings section.
Chat appearance
The group contains settings related to how the chat looks in the browser, embedded and app views.
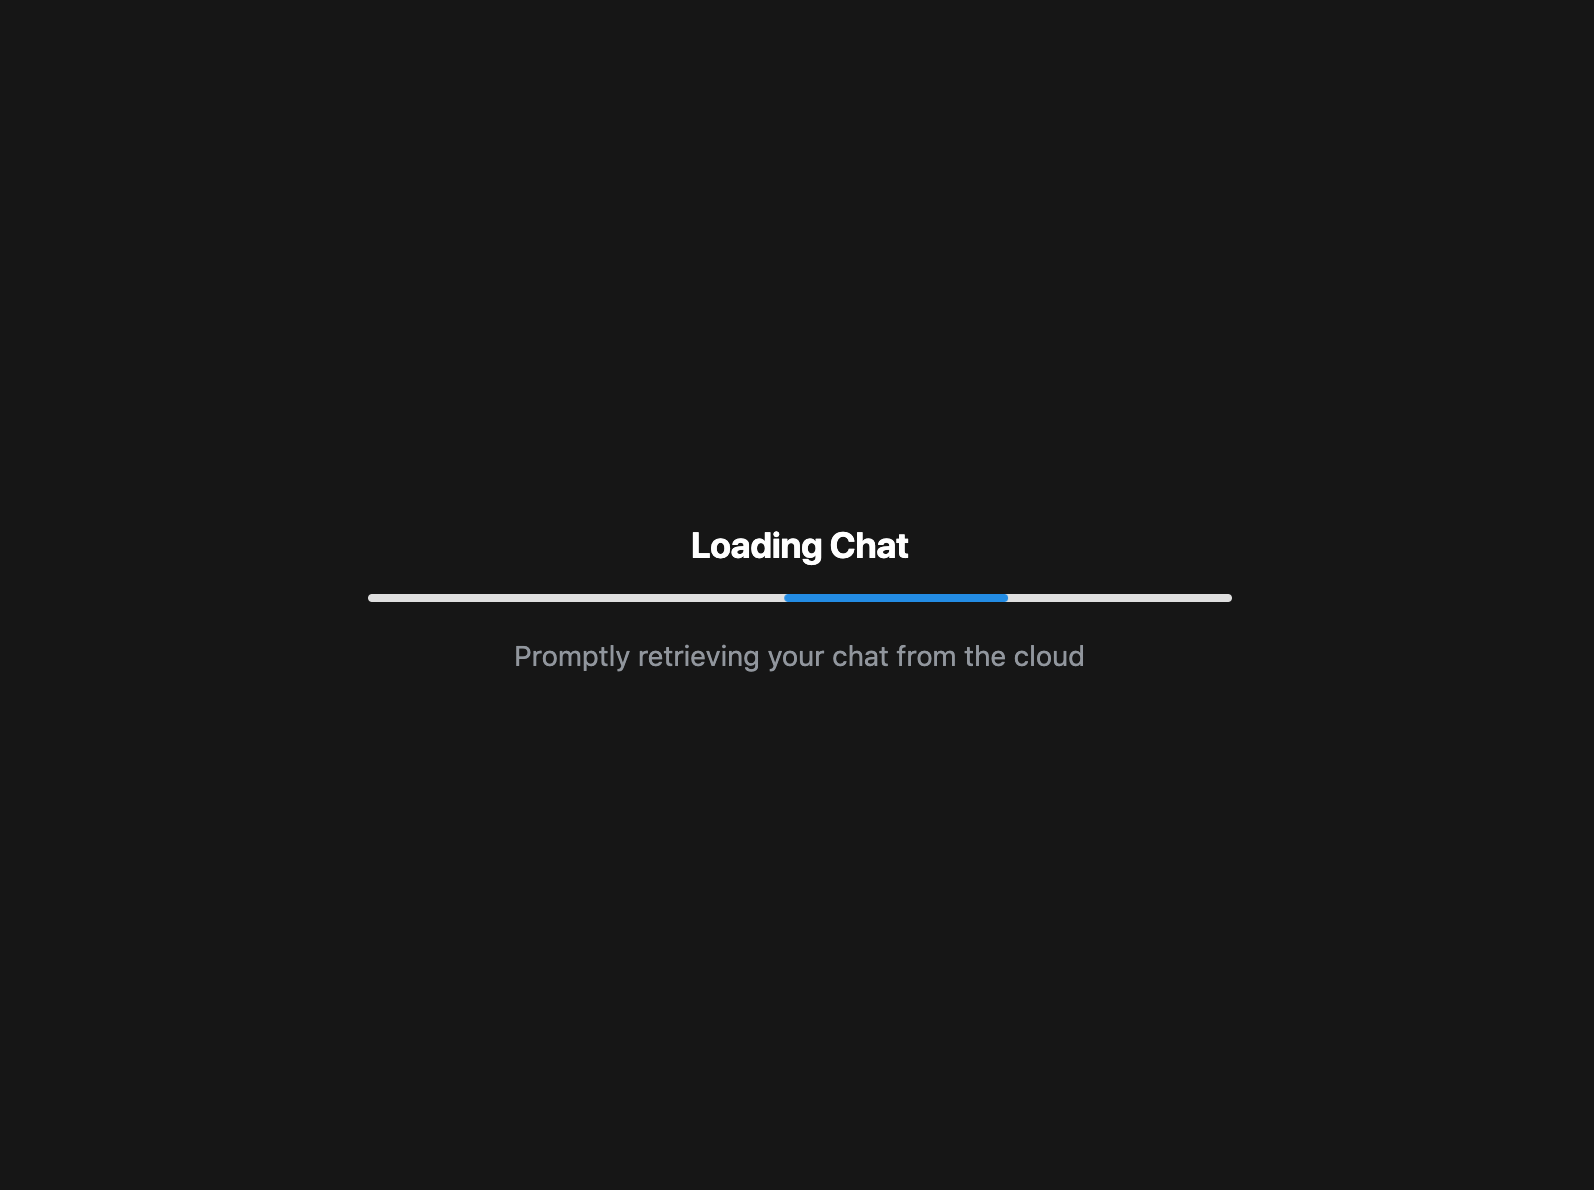
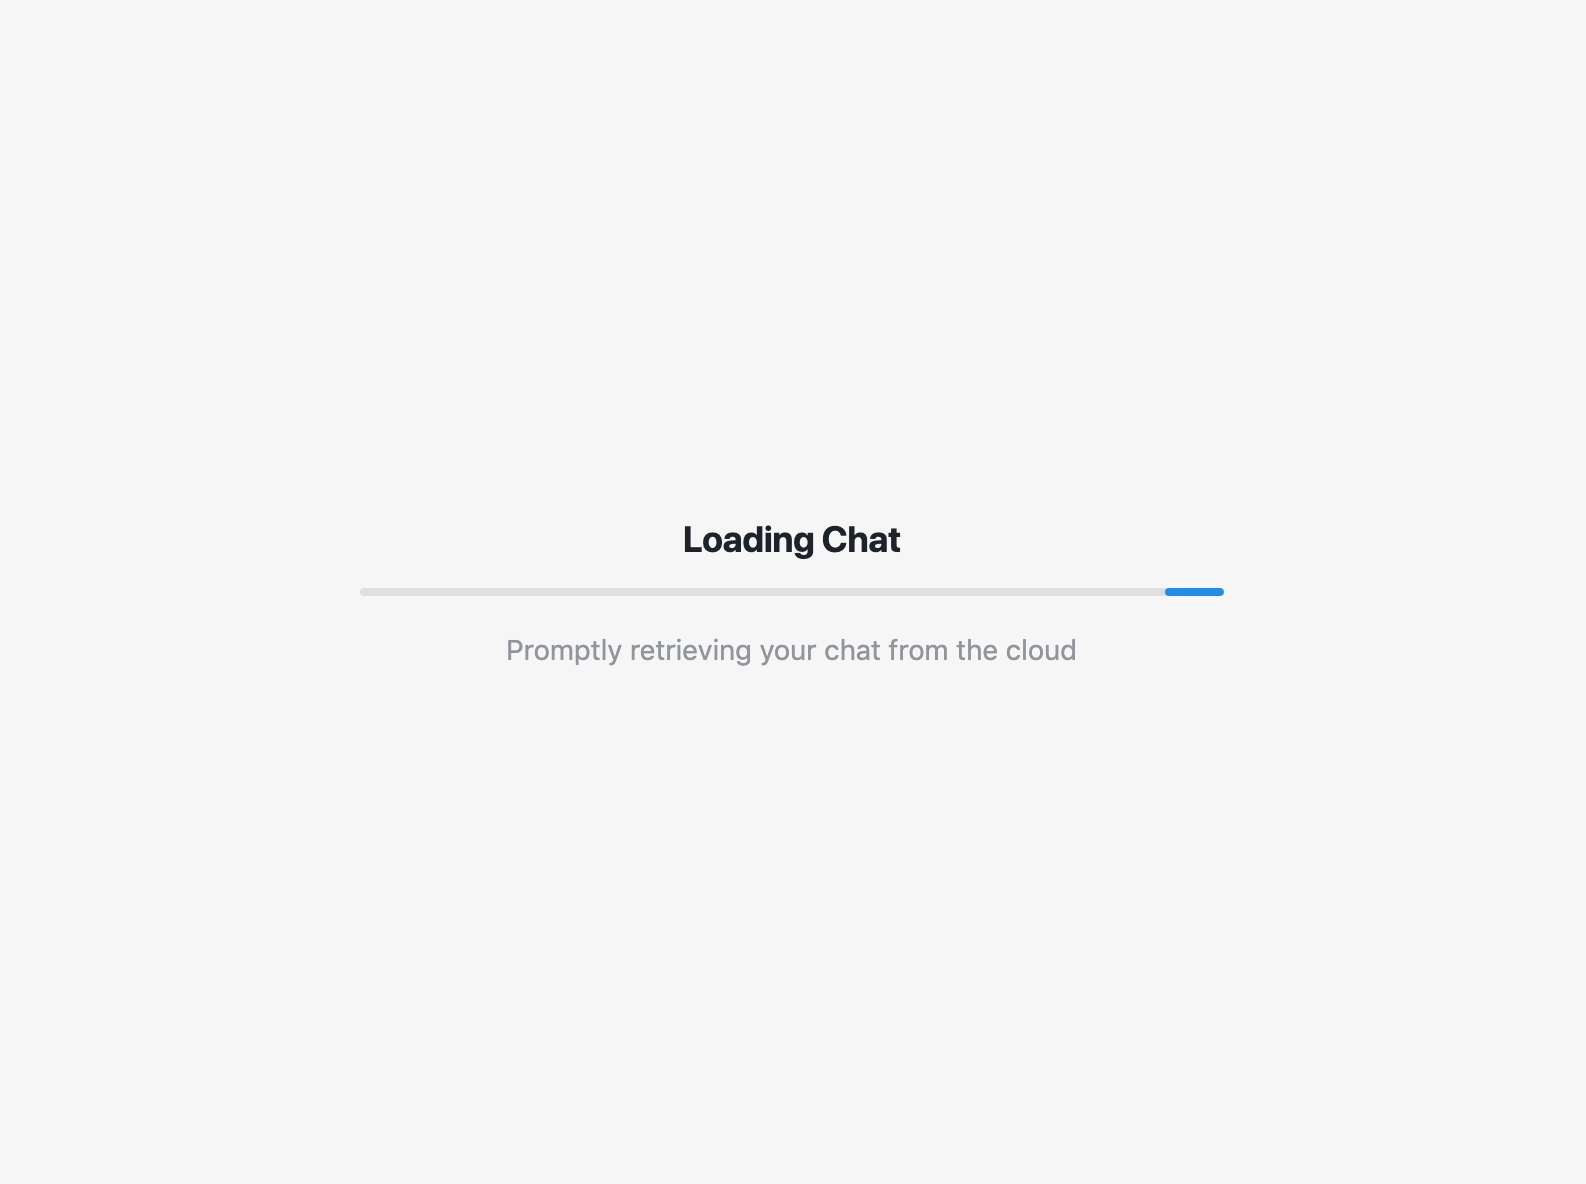
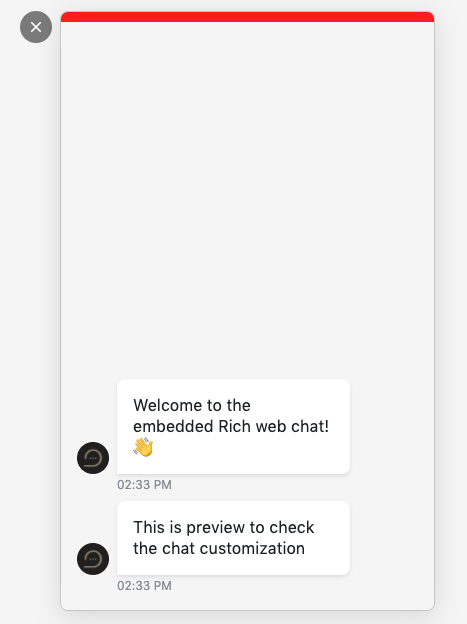
Theme
The default chat theme is Auto. It matches the selected theme of the chat user's browser. When the theme is set as Light or Dark, it is independent of the chat user's browser settings.
| Dark Theme | Light theme |
|---|---|
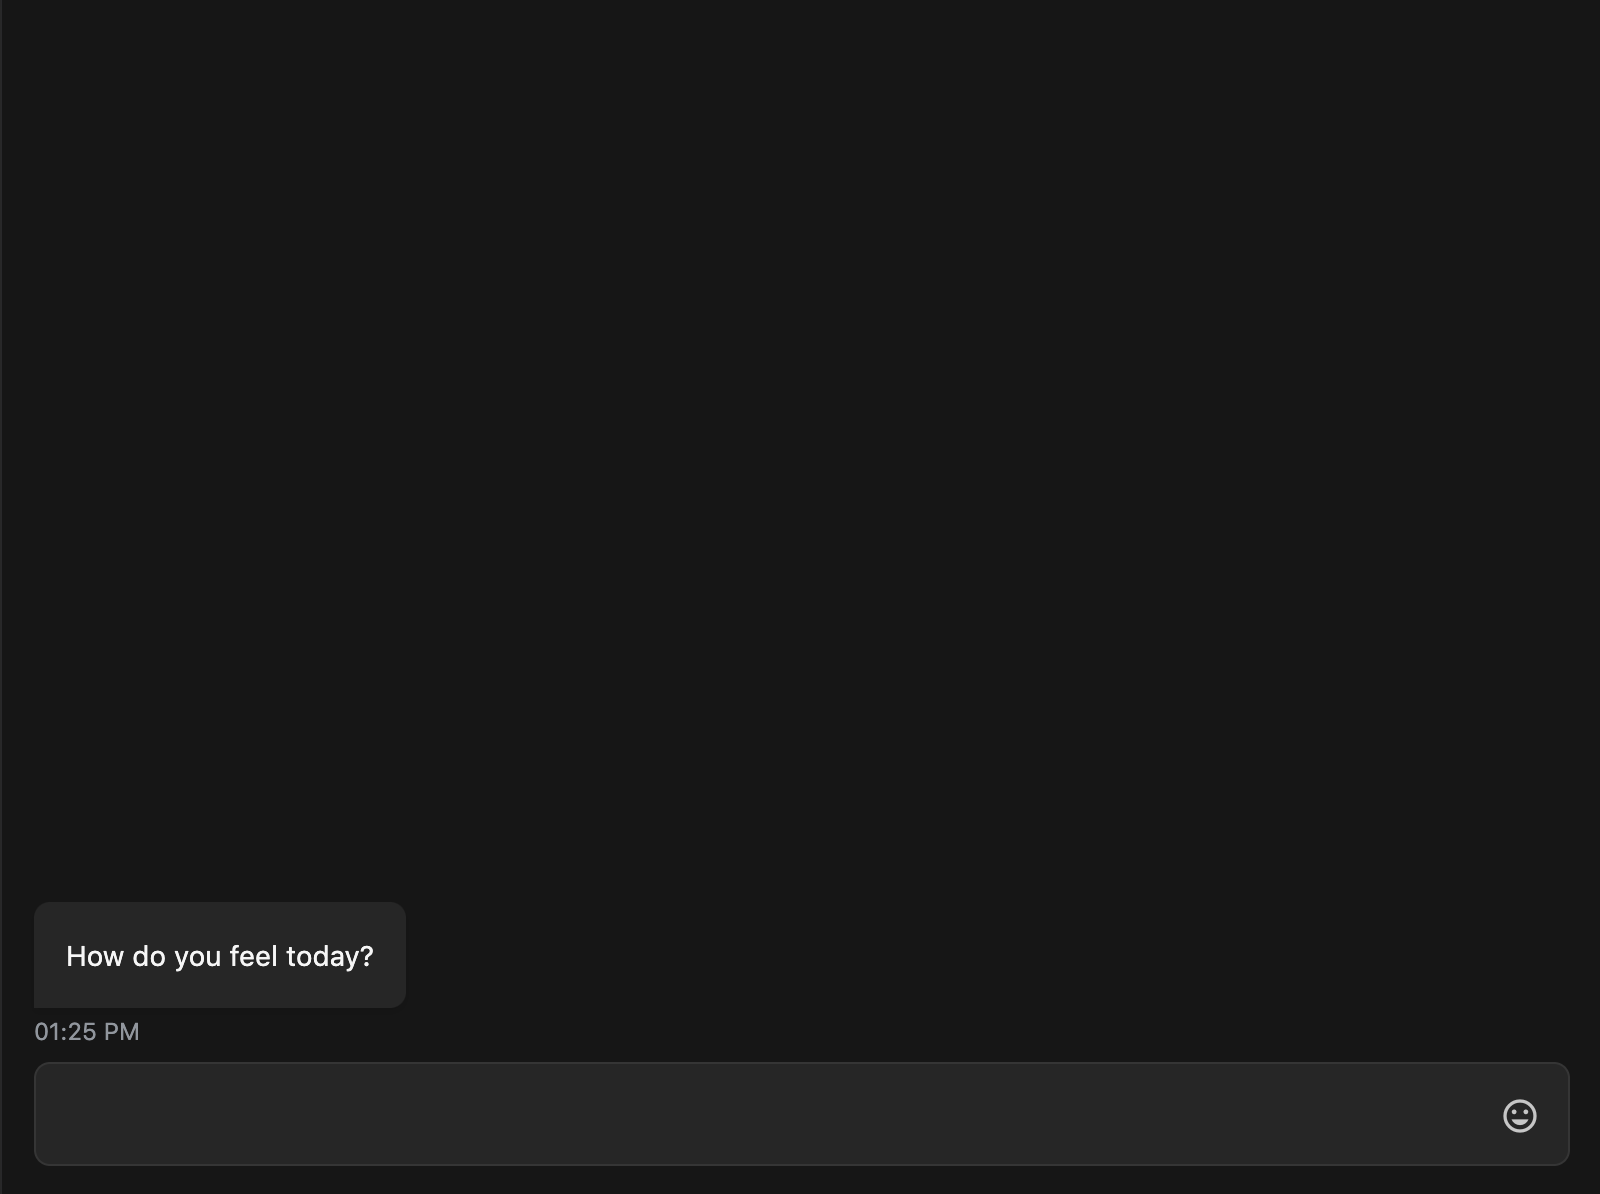 |  |
The theme applies to the chat loader. Change of the chat theme updated RWC URL with different values of the loader theme query parameter: ?loader=light, ?loader=dark or ?loader=auto.
| Dark Theme | Light theme |
|---|---|
 |  |
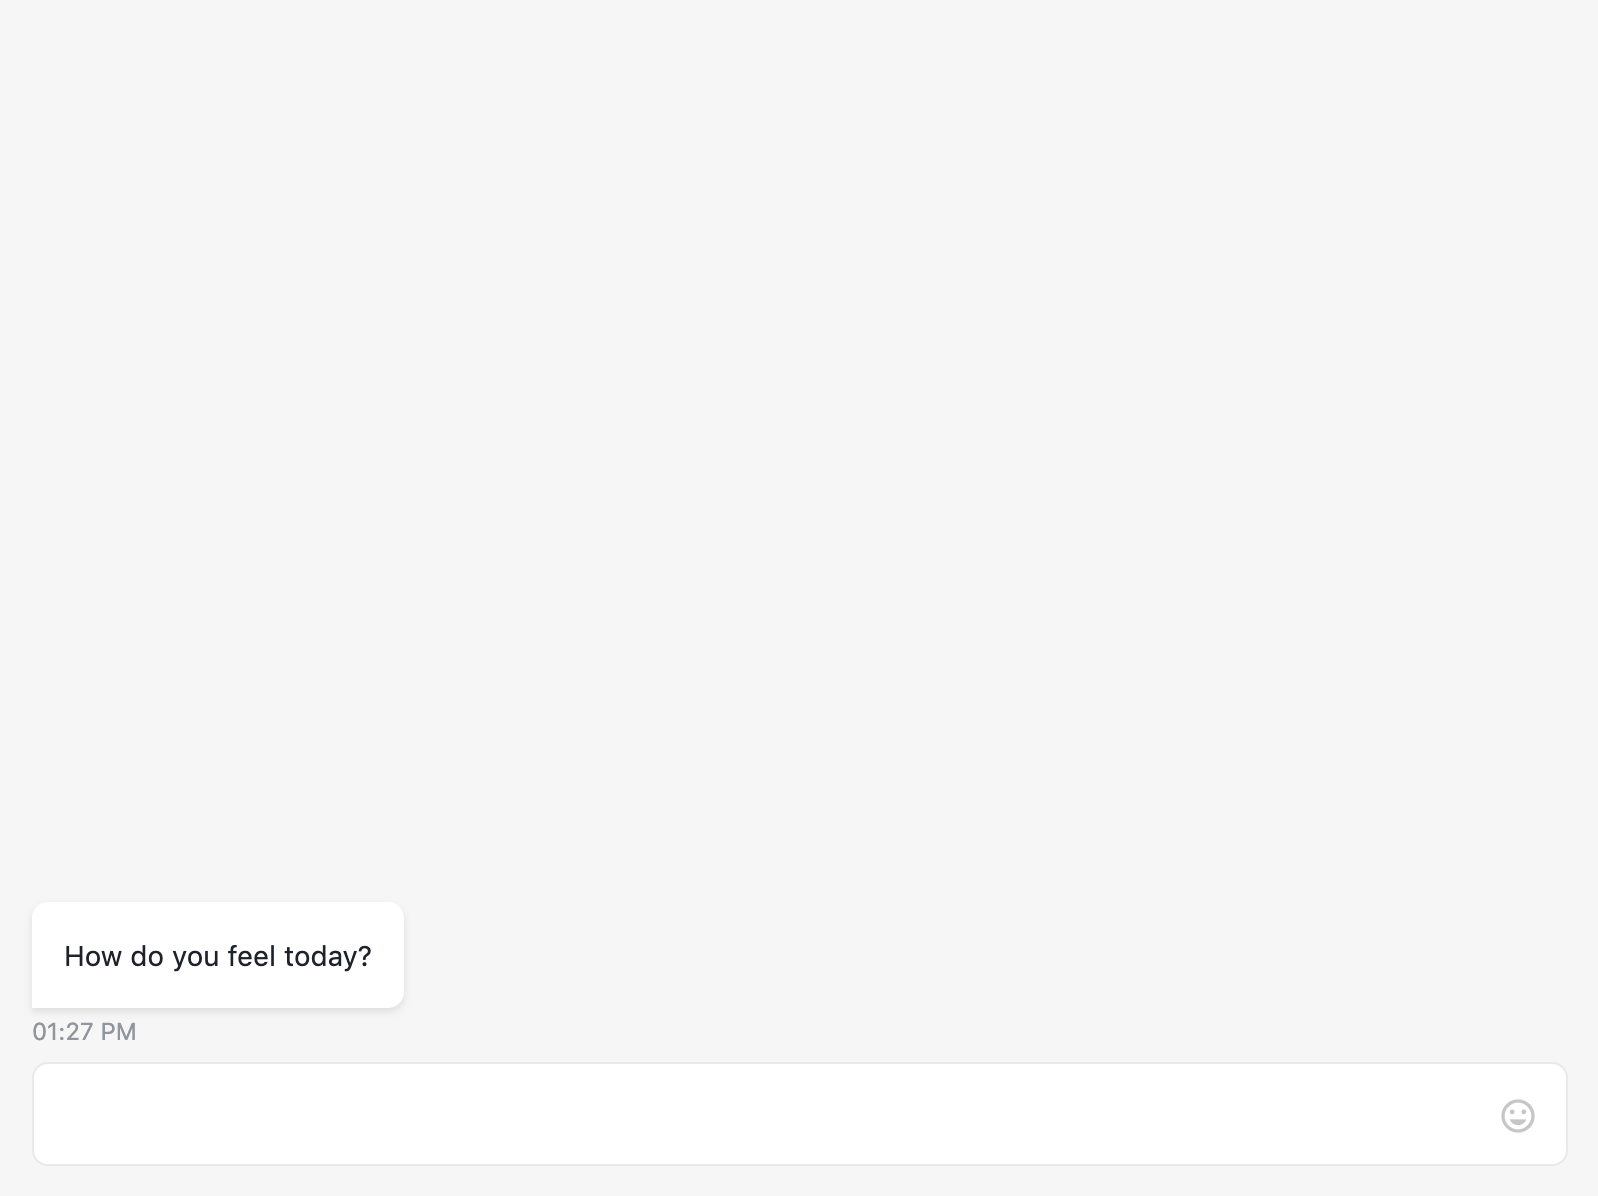
Chat loader
When the user opens the chat it shows the chat loader by default. If you don't want to show it, use Enable to hide chat loader. It hides the loader and updates the RWC URL with the query parameter value ?loader=hidden.
Style
The chat provides 2 predesigned styles Wide messages and Bubble messages.
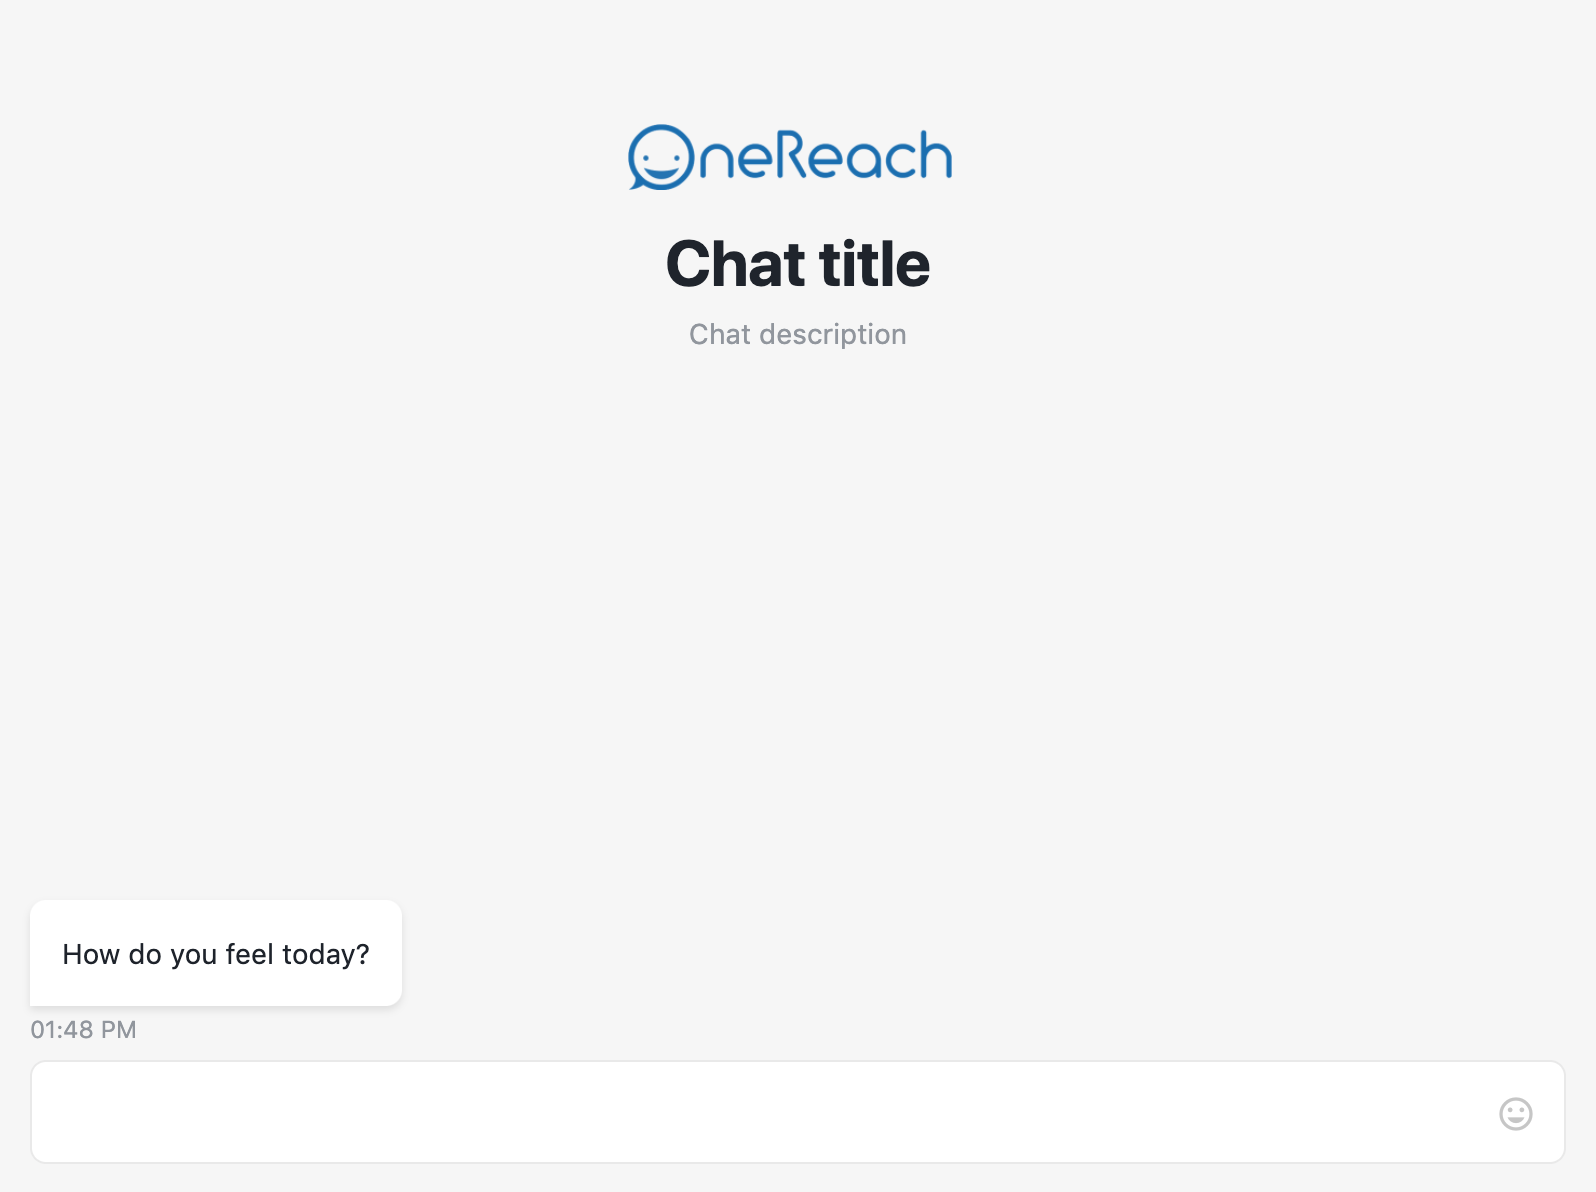
Chat title, description, header image
Both the Chat title and Chat description can be set manually or left empty. If either value is too long, it will be truncated. The length depends on the device the visitor used to start the conversation, so make sure it is below the suggested user-friendly character limits:
- Mobile (vertical): title - 35 ch, description - 300 ch
- Desktop (horizontal): title - 100 ch, description - 700 ch
Note, that the Chat description will be visible to the chat user only until they send the first message.
Choose the chat Header image from the Files or set it as a URL. The chat Header image appears above the Chat title.
| Default | Minimized |
|---|---|
 |  |
Bot icon
You can optionally add the Bot icon by choosing the image from the Files or setting it as a URL in + Add chat bot icon from Files or use URL.
It will appear next to every bot message.
![]()
Once the Bot icon is set, it is applied to all the messages in the chat history as well, even if they were received without the Bot icon or with another Bot icon image.
If the message build of the Cards or Text component doesn't contain any text or file attached, it won't have the Bot icon.
If you use the Custom template component of the Request Response (RWC) Step, it has the Show bot icon for the message toggle for the message within the component.
Also, you can set or override the icon for one message.
Chat settings
The group contains settings related to general chat behavior.
Chat language
This setting defines the language of the system-generated texts in the chat. Find details in the Set up chat language localization article.
Show typing indicator while processing user answer
It serves to fill in the time gaps between the bot's messages with a typing indicator to let the user know the chat is still active. Find details in the Typing indicator article.
Bot answer delay duration
This field is available only when the Show typing indicator while processing user answer is disabled. Bot typing indicator duration serves to make automated conversation look natural as if it takes a human some time to write a user a message. Find details in the Typing indicator article.
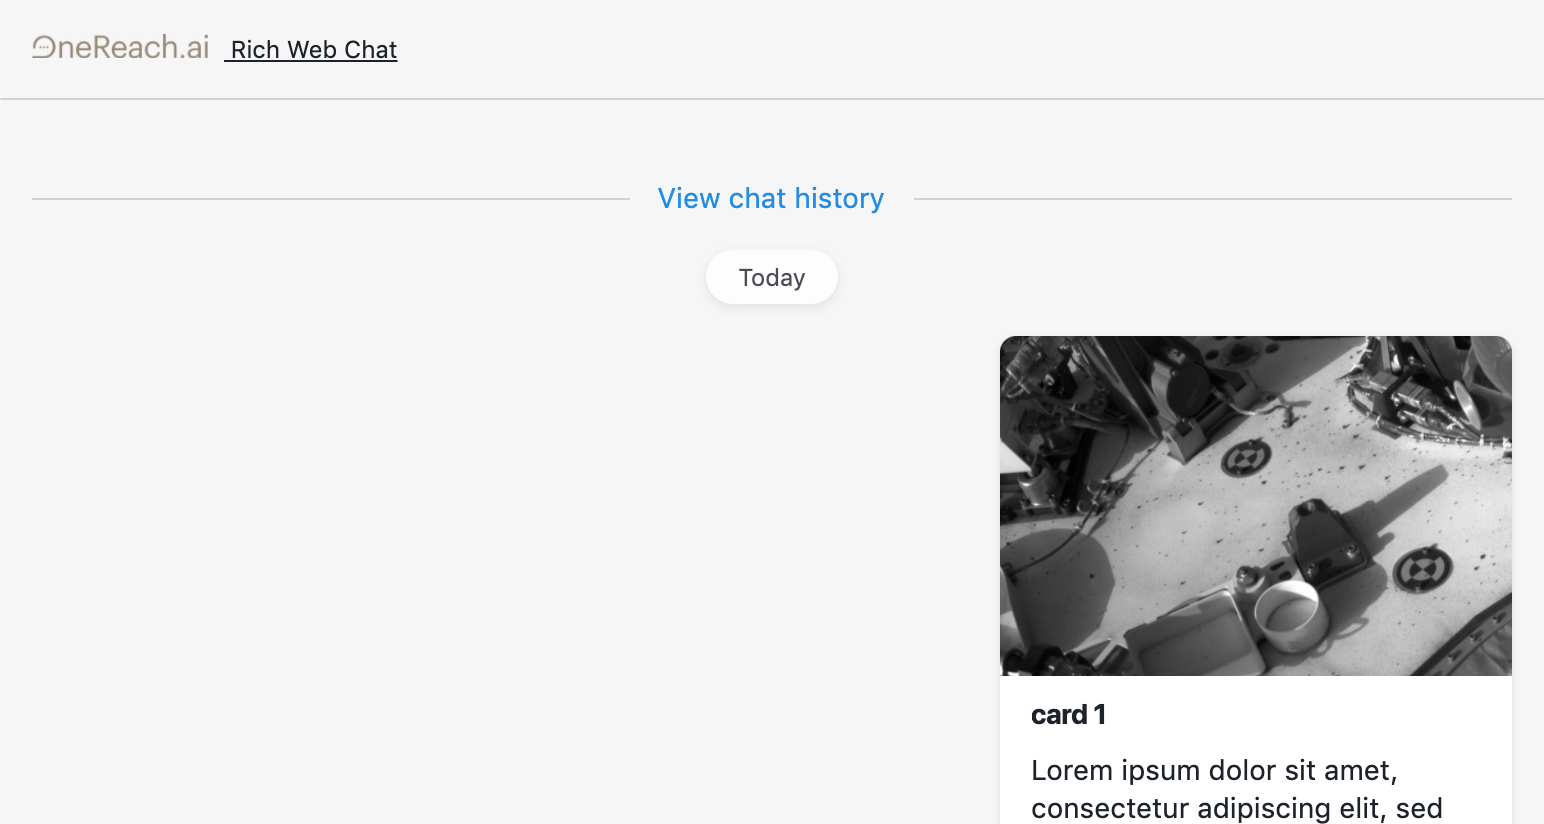
Allow user to view conversation history
To provide the user with an option to view chat history, turn on the respective toggle. The history is stored in the cache from the first chat URL loading independently on the toggle state. When the toggle is ON and the chat user initiates the chat, a button to View chat history will be present with all conversations divided into days.
View chat history button in the chat:
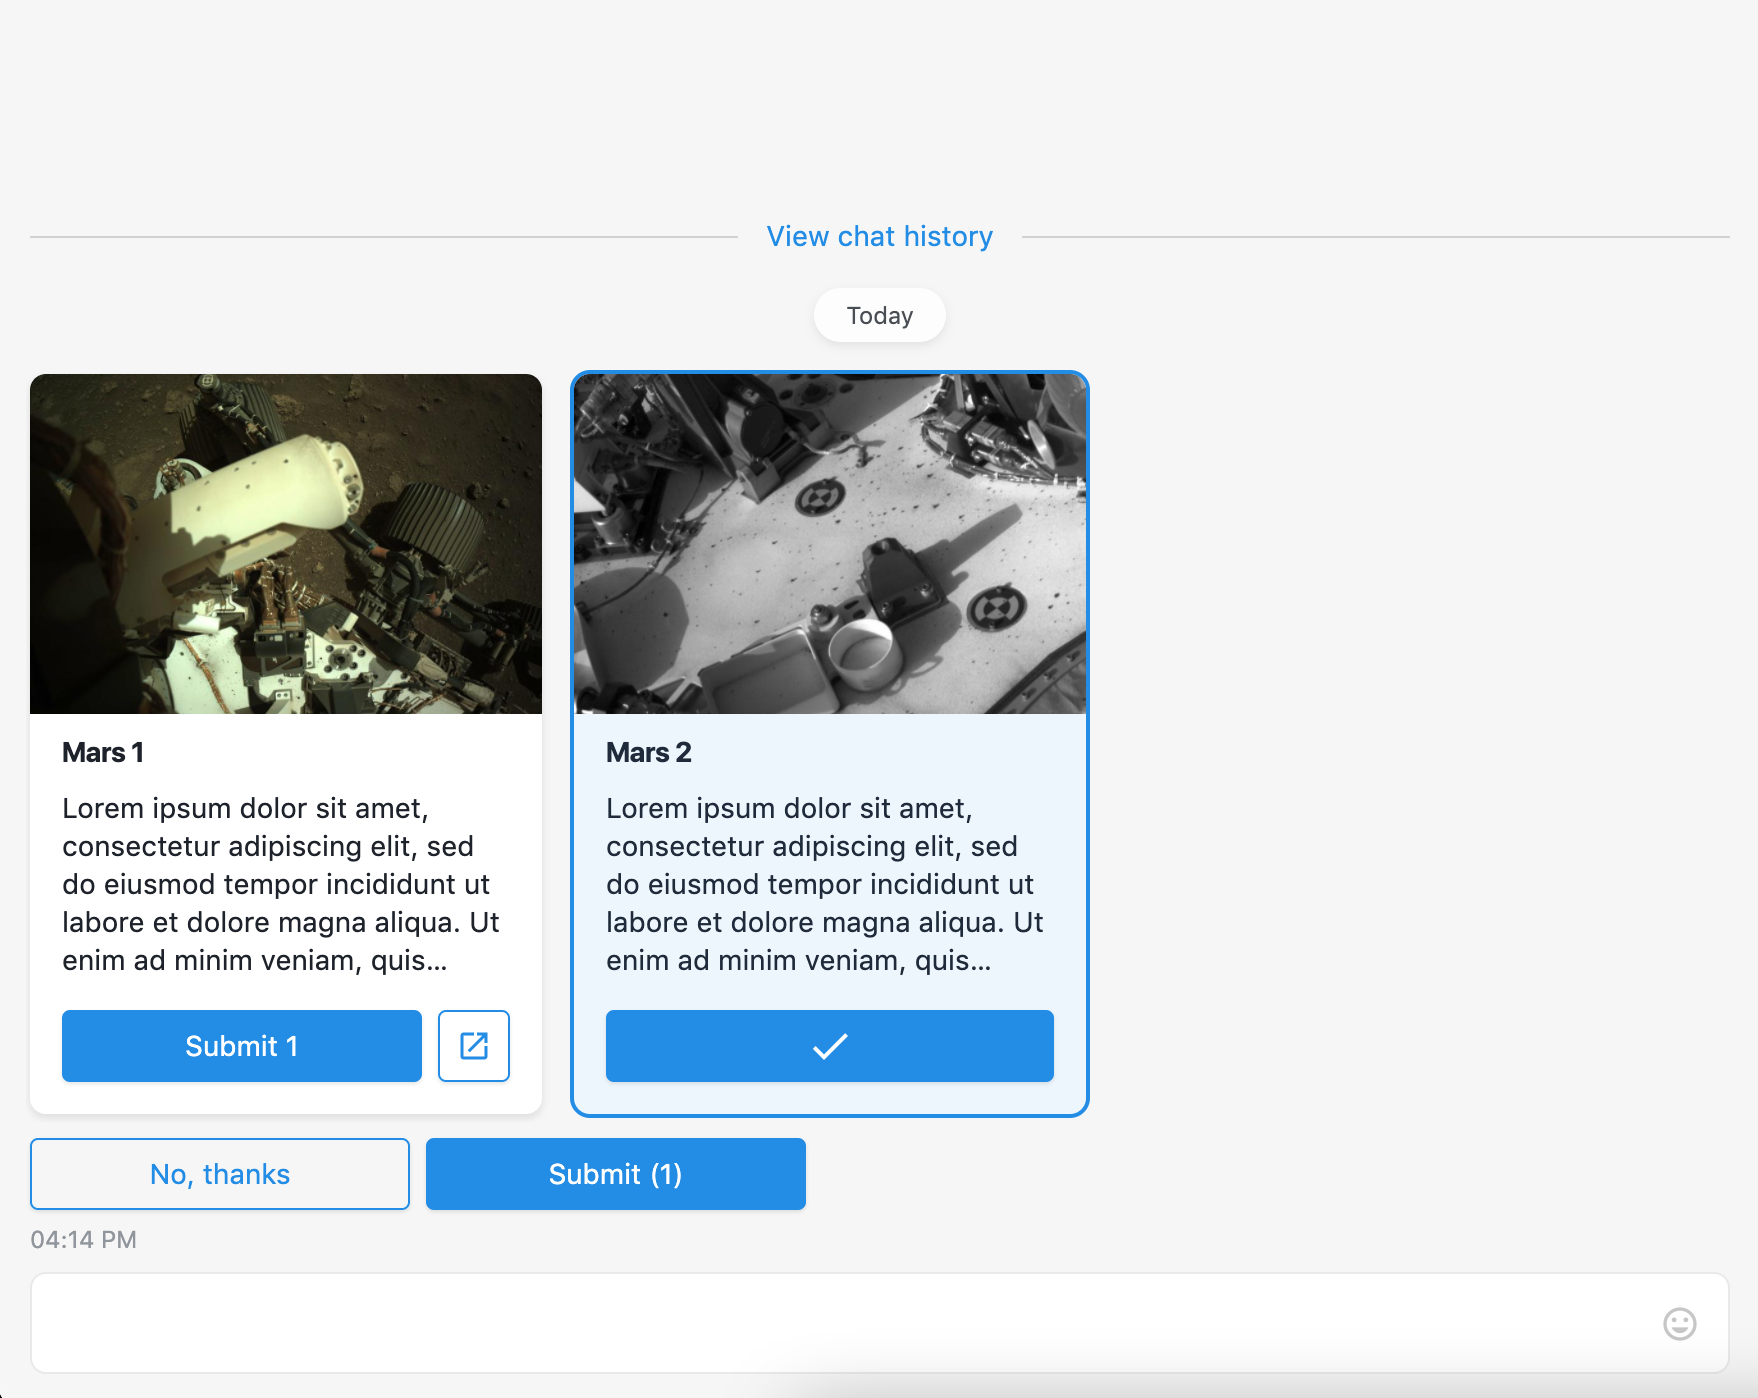
Expanded history in the chat:
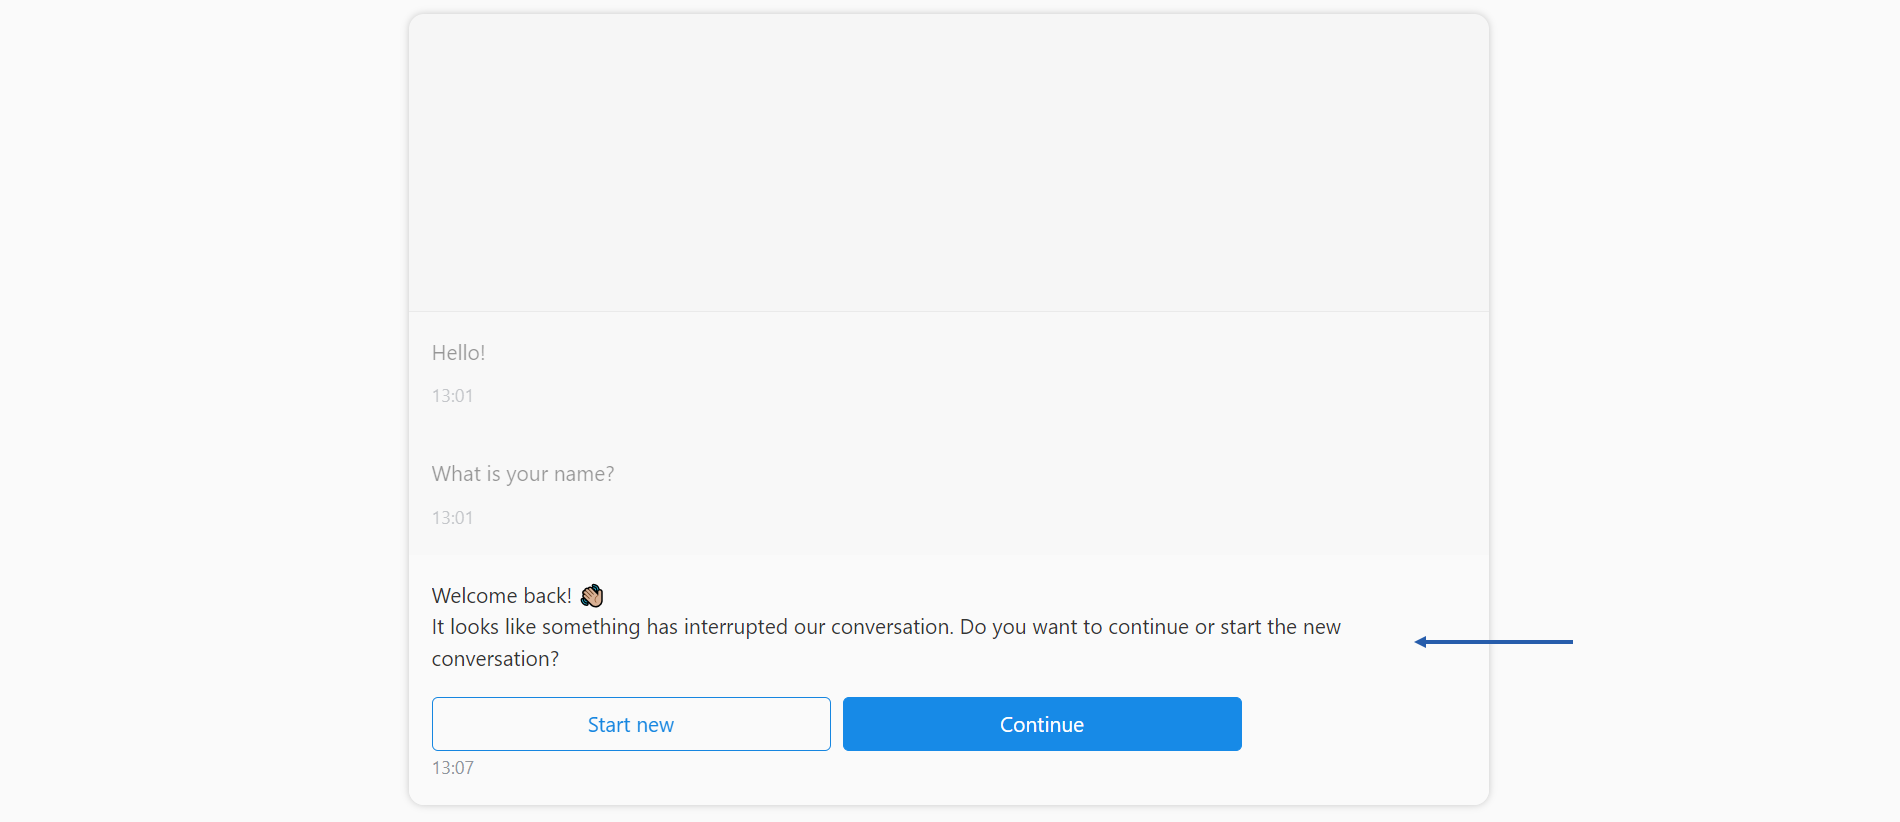
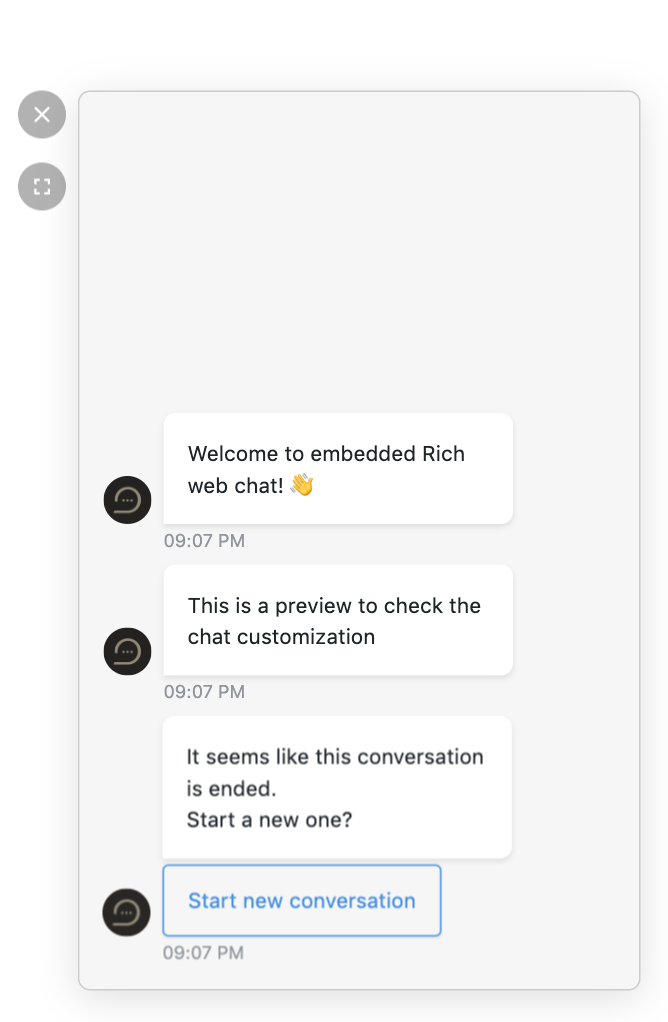
Allow to continue interrupted conversation or start a new one
This setting lets chat users catch up with unfinished conversations. For example, if the user reloaded the page in the middle of the conversation it should end the user session. However, you can enable this toggle, the chat will not end the session, but will send the user the following standard message to the chat after the page reloading:
WARNING
Note, that the setting neither affects the conversation if the conversation ended due to the Flow end or timeout nor sends this message.
After receiving the message, the user can Start new conversation from the very beginning in a new user session or Continue the conversation from the last sent message in the same user session.
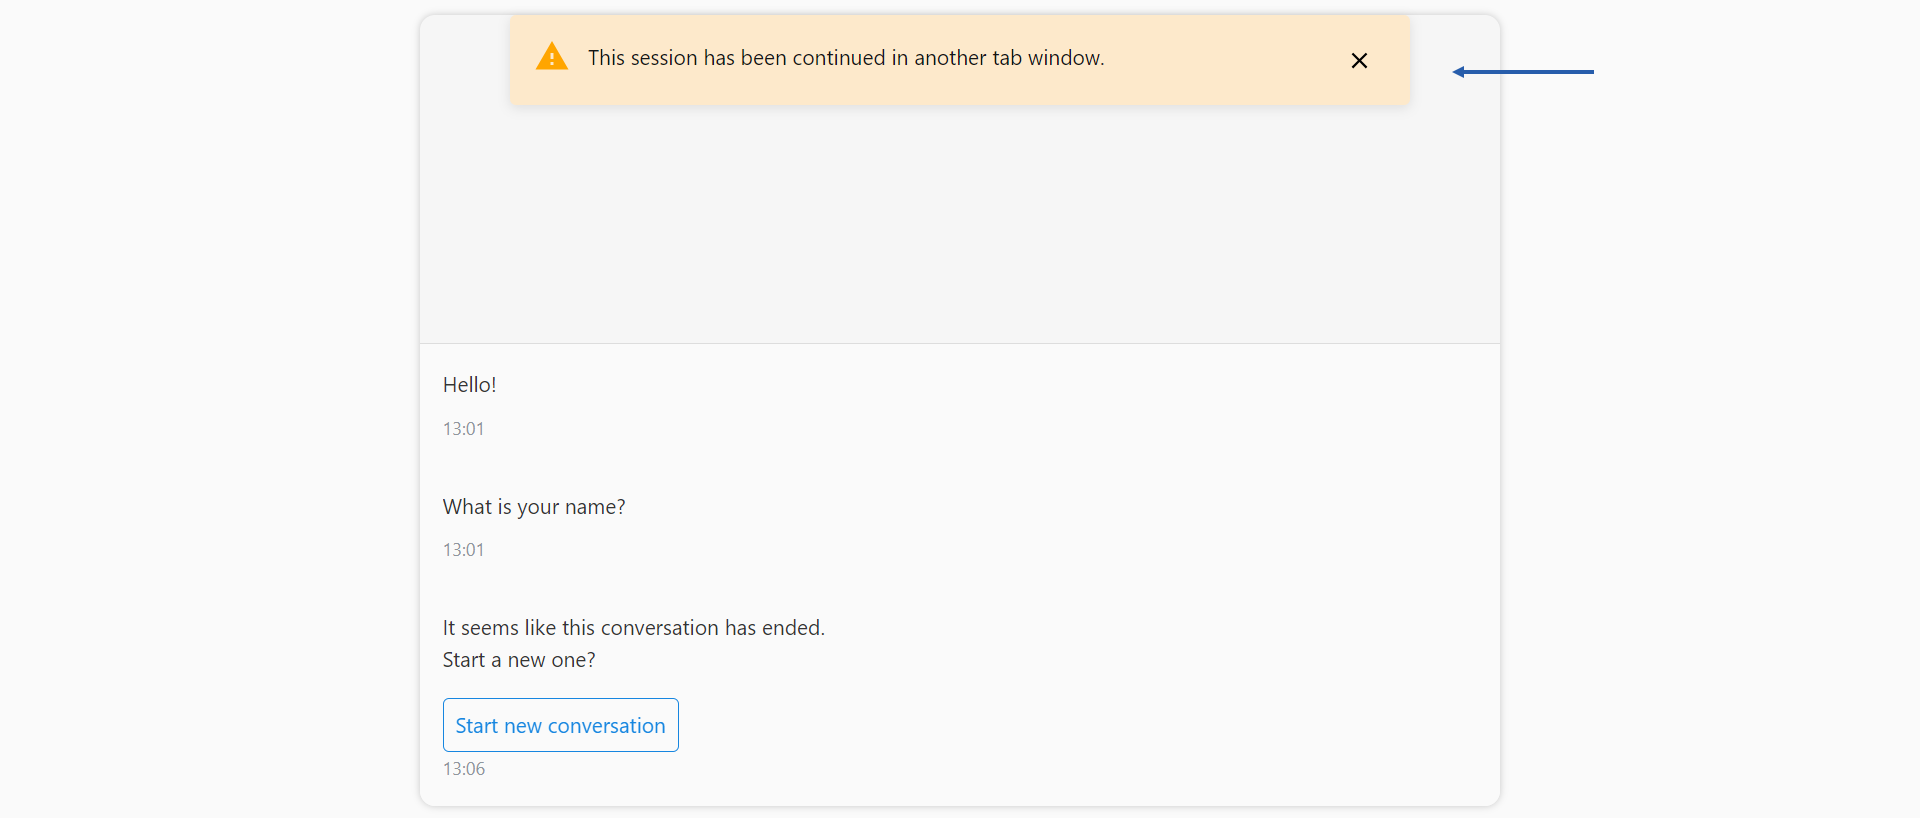
Once the conversation is interrupted, the chat user can at times open it in multiple tabs of the same browser. However, they can click Continue only in one tab. Afterward, they get the following notification in another tab:
Allow starting a new conversation when the flow ended
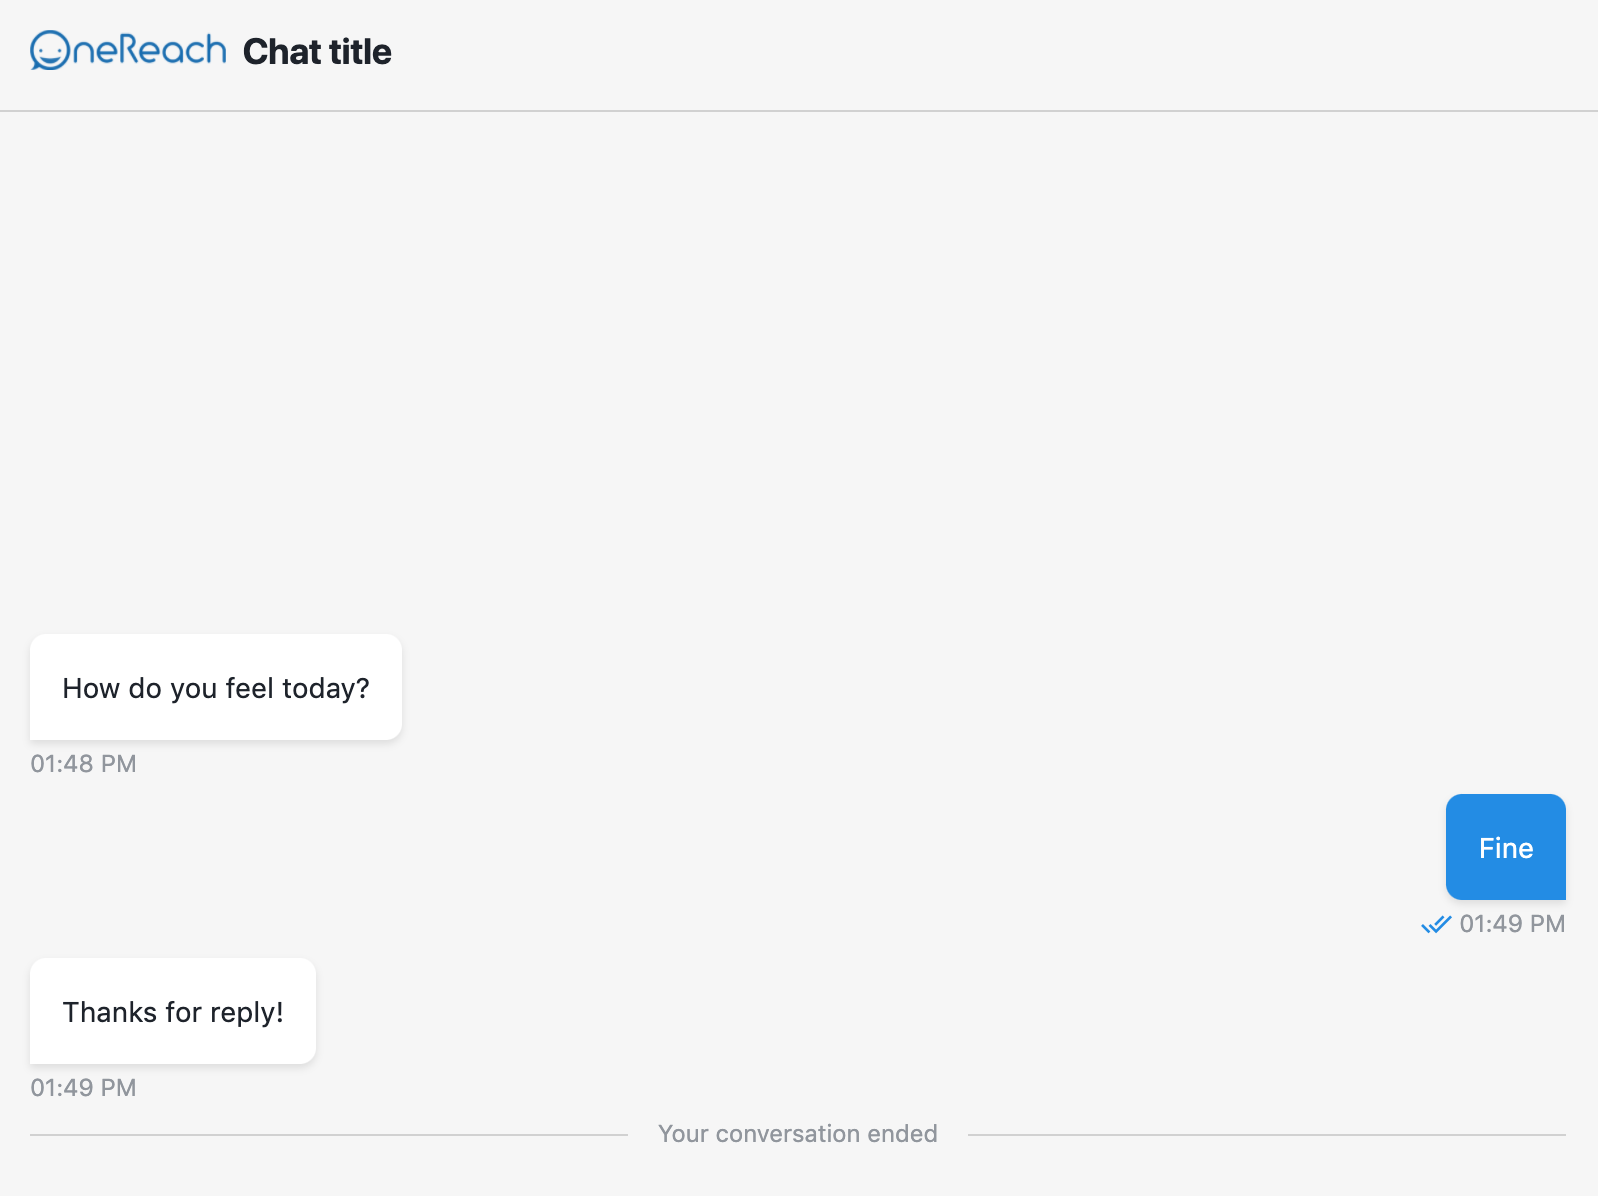
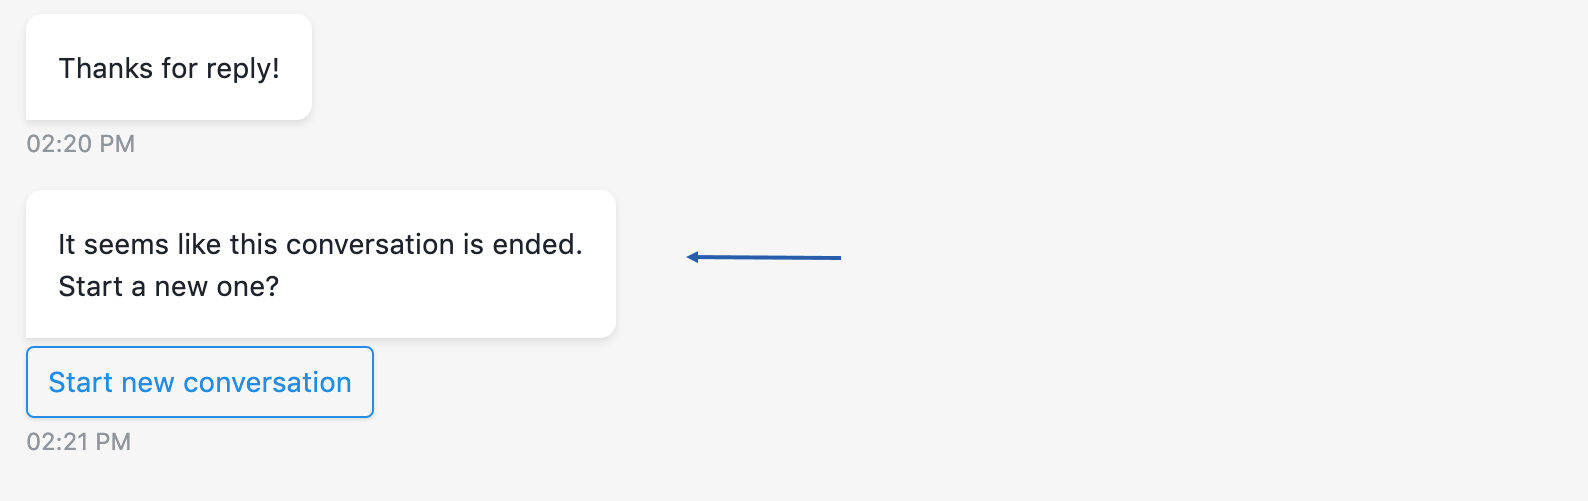
Enable this toggle to make conversation restarting easier for the chat user. By default when the Flow reaches its end or timeout, the label Your conversation ended appears in the chat. In this case, to restart the conversation, the chat user needs to reload the browser page manually. If you enable the toggle, the chat will send the following standard message when the conversation ends.
Control conversation end manually
Turn on the toggle when your RWC Flow contains the Trigger Another Flow and Proceed Step. It will prevent the simultaneous execution of the main Flow and Triggered Flow. To make the conversation end in the main Flow or Subflow, add End Conversation (RWC) as the last Step of every leg of the main Thread where the Flow is expected to end.
The active toggle prevents sending the conversation end to the chat client. So the chat session remains active until one of the following happens:
- The Flow session timeout
- The End Conversation (RWC) Step gets executed and sends the conversation end event
Customize browser tab
The option provides the ability to change the name of a browser tab when it's in focus and out of focus. It creates visual screen changes, that grab the chat user's attention.
Default tab name
The new value replaces the default name of the chat browser tab. By default and if empty, the tab name 'OneReach.ai Chat' will appear.
Changed name, when tab is out of focus
The toggle lets set different browser tab names and customize them when the tab is out of focus.
Out of Focus tab name
Changes browser tab name when the chat user loses focus from the chat tab.
Tab name switch interval
Defines interval after which browser tab changes its name to Changed tab name text. Set 0s to show only the changed tab name. Examples of acceptable time formats: 1m 12s or 72s.
Embedded chat customization
Add an embedded chat window to your website so the users can quickly get answers to their questions by chatting with a bot while browsing your site. The chat window sits unobtrusively on your webpage. When customers want to chat, they just click the button to launch the chat.
User can start chatting while viewing your webpage and minimize/maximize the chat window or change its position, so it’s not in their way.
Find a basic tutorial in the Embed your RWC into a web page article.
How to embed to SPA app
RWC is also available on npm @onereach/rwc-client.
To embed in the SPA application, first, you need to install the package and include CSS styles: npm i @onereach/rwc-client
js
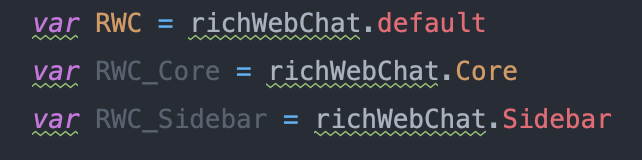
import RWC from '@onereach/rwc-client'; // default skin
import { Sidebar, Core } from '@onereach/rwc-client'; // custom skin

// include css globally
import '@onereach/rwc-client/dist/lib/richWebChat.css';
import RWC from '@onereach/rwc-client'; // default skin
import { Sidebar, Core } from '@onereach/rwc-client'; // custom skin
// include css globally
import '@onereach/rwc-client/dist/lib/richWebChat.css';Then the setup is the following:
js
var app = new RWC({...parameters})var app = new RWC({...parameters})Embed chat styles
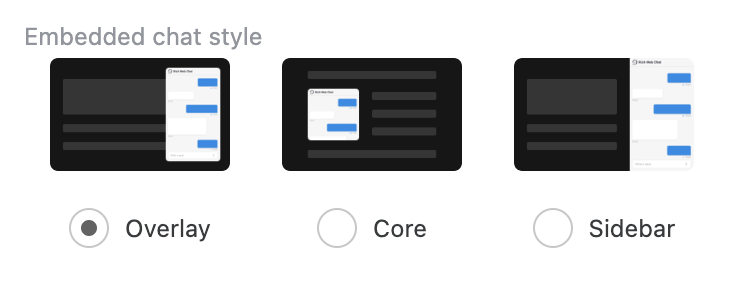
RWC supports 3 different embedded chat styles: Overlay, Core, Sidebar.
Every style has different settings and appearance. Once you change the chat style, the snippet code to embed chat changes too.
1. Overlay
This is the default chat style, the version we are used to. Chat will be displayed with the widget and placed above the site after opening it.
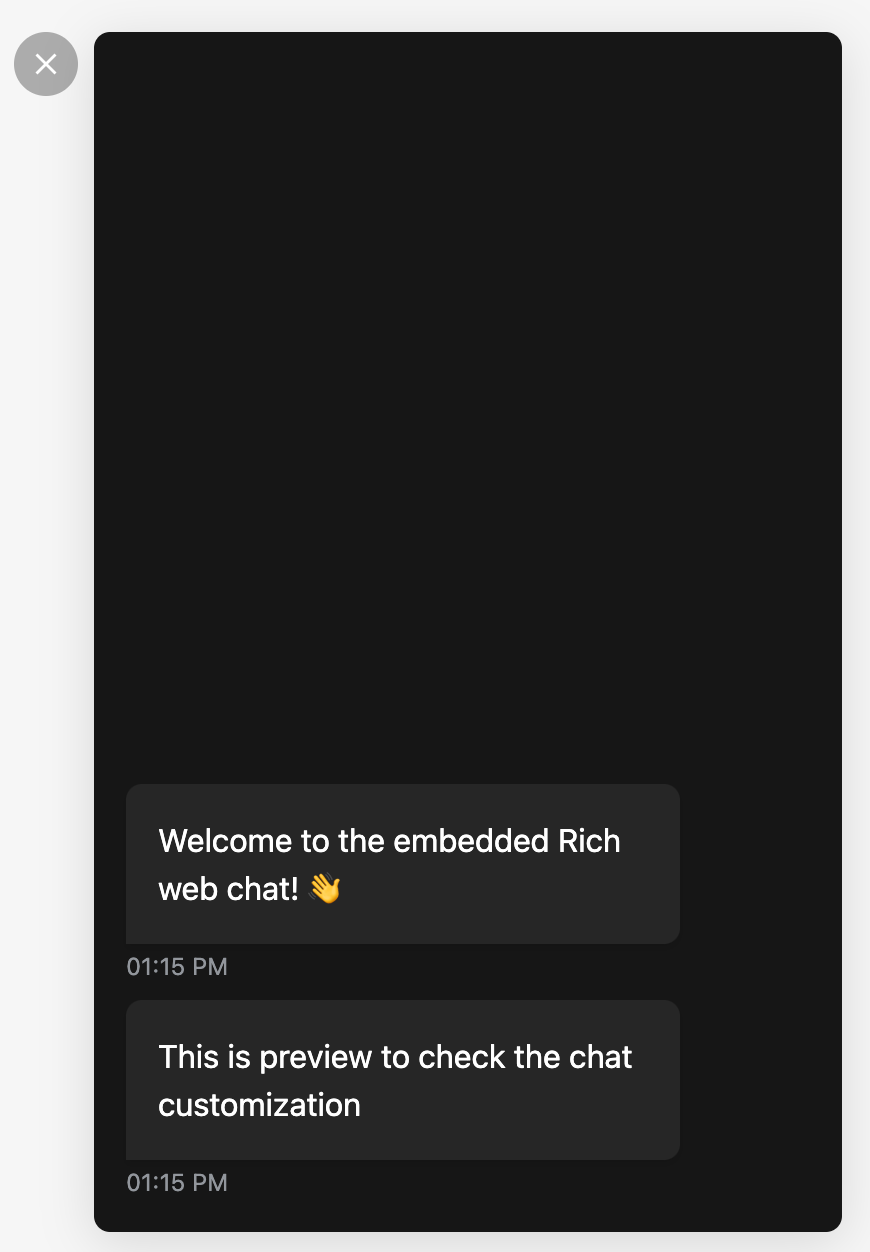
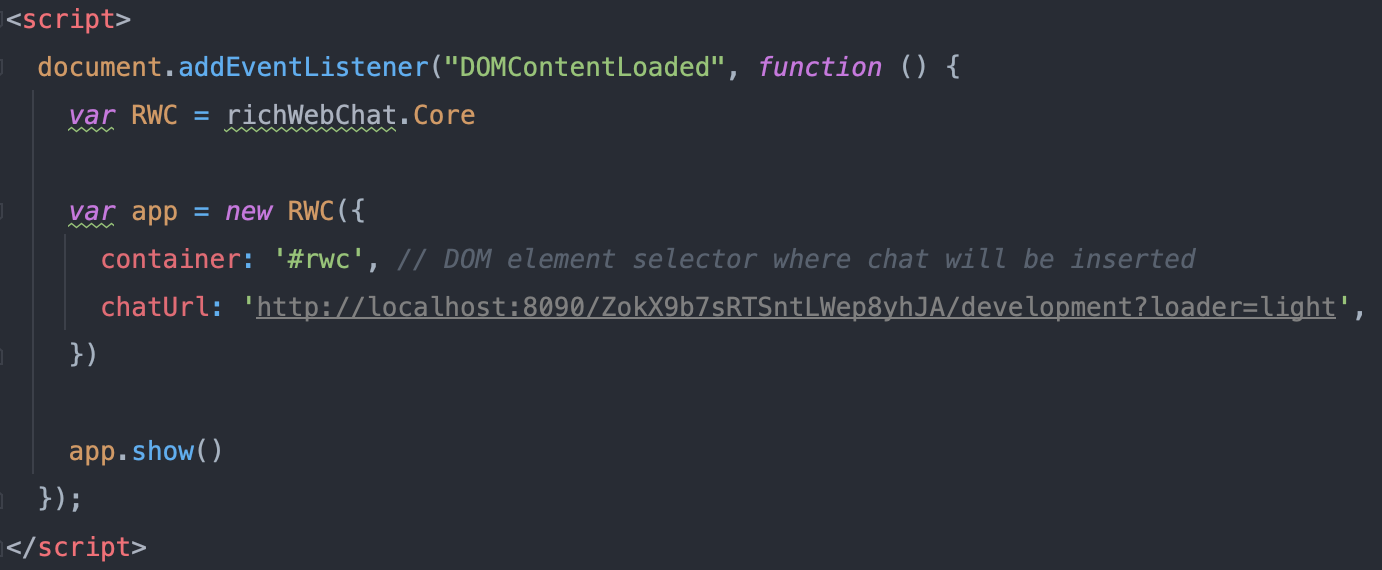
2. Core
Pure chat frame without widget and welcome message. Can be used for embedding inside the special block or with a custom size/appearance. After embedding you need to call the rwc.show() function to start the RWC conversation.
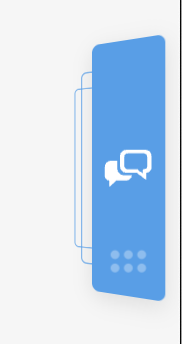
3. Sidebar
RWC is embedded as a sidebar. After opening, it occupies page space on the right side.
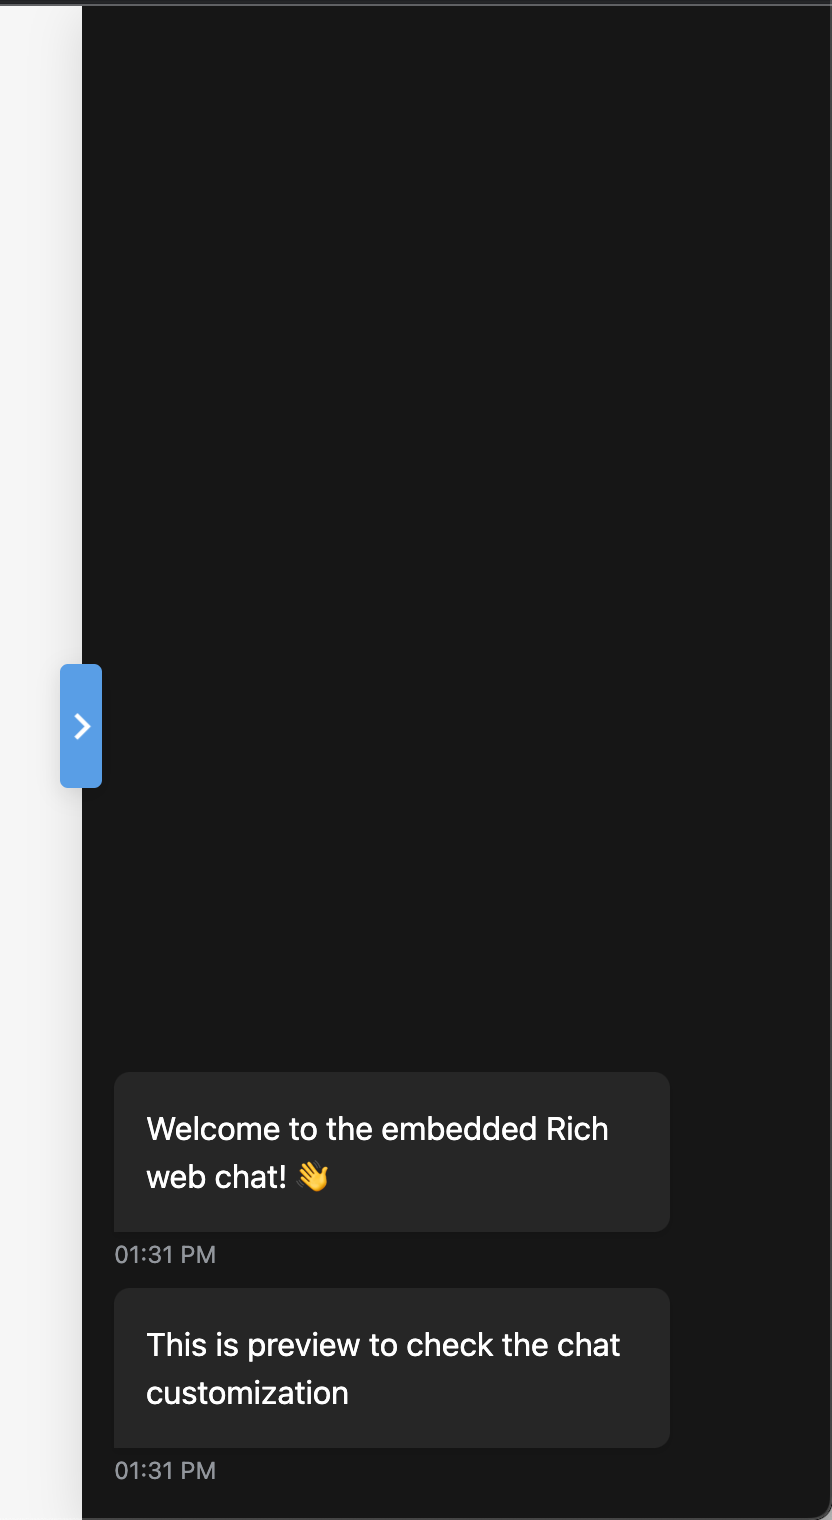
WARNING
The Sidebar embedding chat style affects the page template and styles. You should check page appearance when using this style.
Widget settings
The group serves to set up the initial view of the embedded chat as a widget.
Widget icon & color
The widget has a default icon and color. To change widget color, use palette. For example, orange. To add a custom bot icon, either provide a URL or choose the image from the Files storage. For example, the image of OneReach.ai logo:

Initialization code for the widget icon and color
You can modify the logoUrl and color props in the init code of the embedded chat. The values should be the following:
logoUrl- URL for the image that will be inside a widget buttoncolor- color of widget button
Example:
js
widget: {
    position: 'bottom-right',
    animation: 'pulse', // 'pulse', 'ring', 'zoom',
    color: '#409fec',
    logoUrl: '',
    revealDelay: 0,
    openDelay: 15000,
},widget: {
position: 'bottom-right',
animation: 'pulse', // 'pulse', 'ring', 'zoom',
color: '#409fec',
logoUrl: '',
revealDelay: 0,
openDelay: 15000,
},Widget location on the website
You can set the position of the chat widget on a website. Available options are:
- Bottom right corner
- Bottom left corner
Depending on the chosen option, the chat window will expand to the left or right side. Unlike the chat window, the chat widget has a fixed position on the screen and can't be dragged manually.
Initialization code for the widget location
You can modify the position prop in the init code of the embedded chat. The values should be the following:
bottom-rightfor bottom right cornerbottom-leftfor bottom left corner positions
Example:
js
widget: {
  position: 'bottom-right', // Bottom right corner
  position: 'bottom-left',  // Bottom left corner
}widget: {
position: 'bottom-right', // Bottom right corner
position: 'bottom-left', // Bottom left corner
}Widget icon animation
| Pulse | Ring | Zoom |
|---|---|---|
 |  |  |
Initialization code for the widget icon animation
You can modify the animation prop in the init code of the embedded chat. The values can be the following.
js
widget: {
  animation: 'zoom',  // Zoom animation
  animation: 'pulse', // Pulse animation
  animation: 'ring'   // Ring animation
}widget: {
animation: 'zoom', // Zoom animation
animation: 'pulse', // Pulse animation
animation: 'ring' // Ring animation
}Widget appearance delay duration
It is the time of how long the popup waits to show itself.
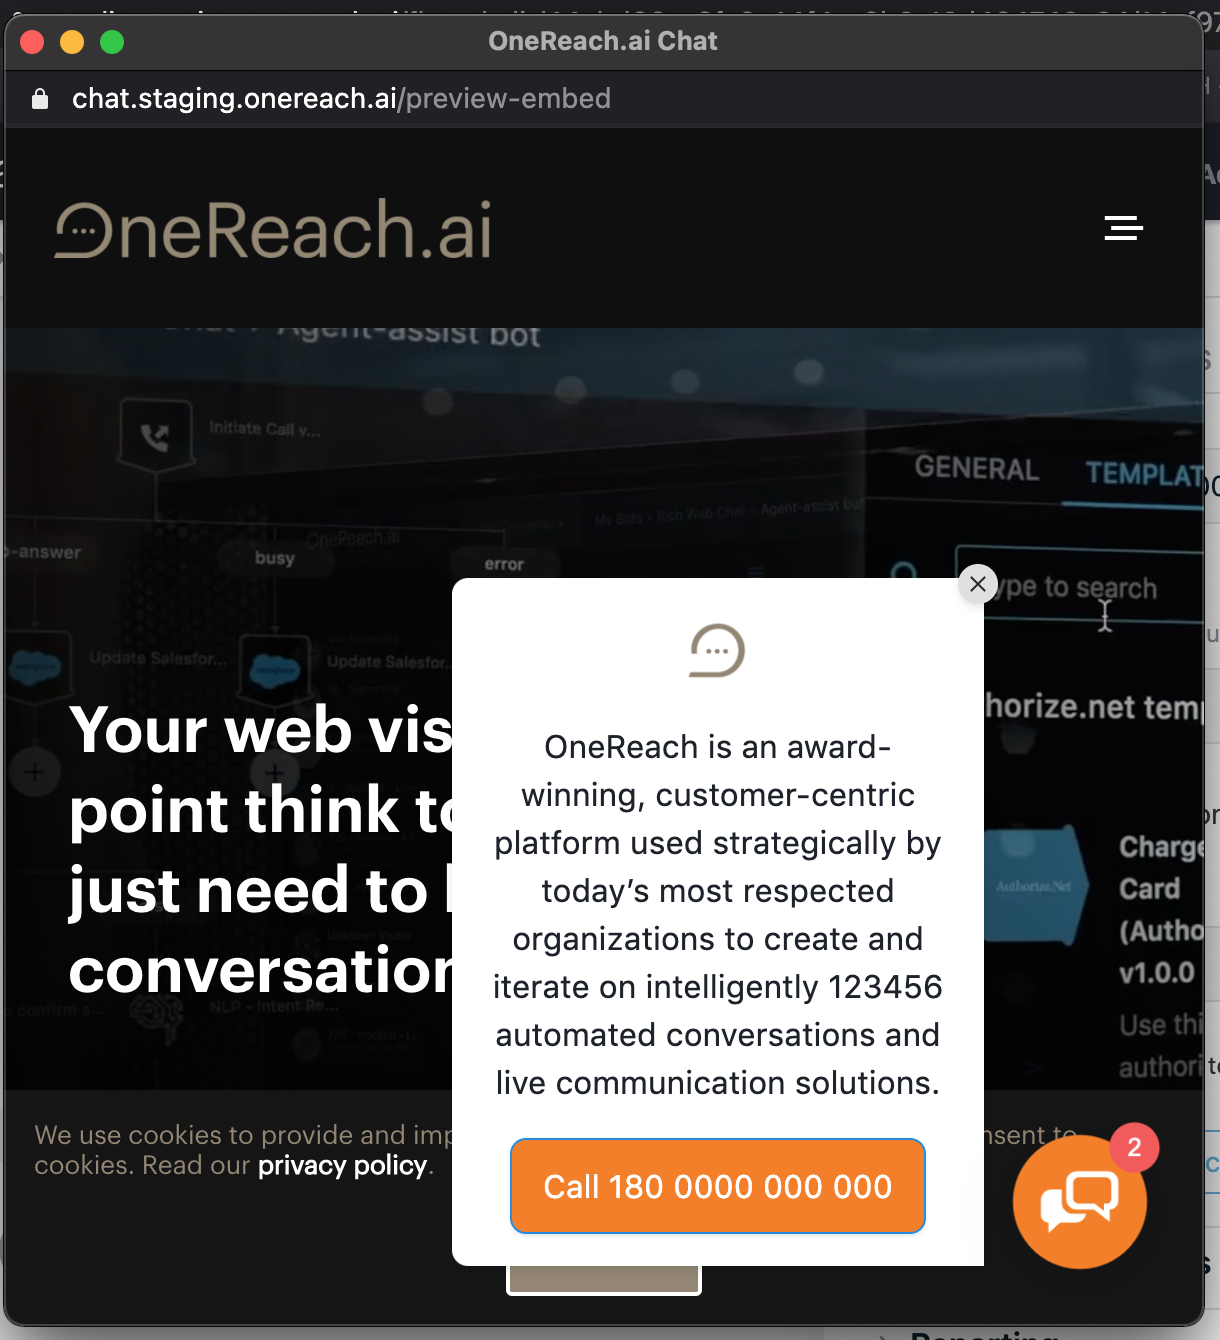
Setup invitation message
Enable the toggle to set the invitation message near the widget button with some additional info for a chat user.
Code structure:
js
invitation: {
  closeable: false,
  imageUrl: '',
  message: '',
  buttonLabel: '',
  appearDelay: 5000,
},invitation: {
closeable: false,
imageUrl: '',
message: '',
buttonLabel: '',
appearDelay: 5000,
},Text
In this field, you can write the text that will be shown in the invitation popup:
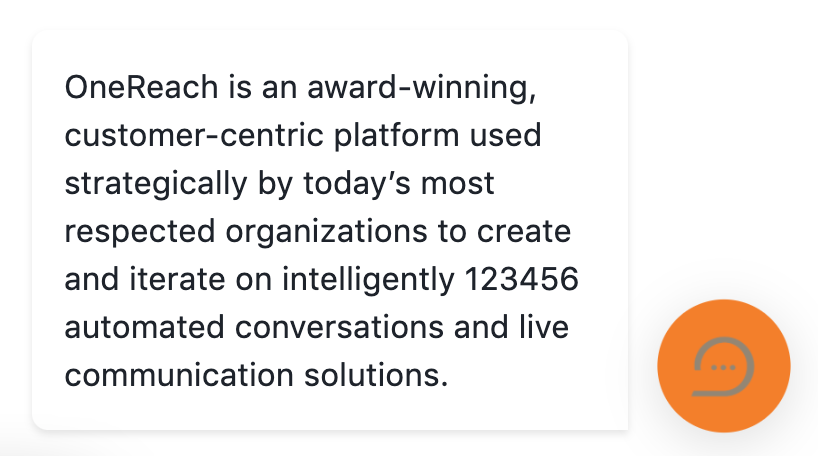
Initialization code for the invitation message
You can provide the text as a string value of the message prop in the init code of the embedded chat.
Example:
js
{
  message: 'OneReach is an award-winning, customer-centric platform used strategically by today’s most respected organizations to create and iterate on intelligently 123456 automated conversations and live communication solutions'
}
{
message: 'OneReach is an award-winning, customer-centric platform used strategically by today’s most respected organizations to create and iterate on intelligently 123456 automated conversations and live communication solutions'
}Image
You can add an image to your invitation popup.

Initialization code for the invitation message image
Example:
js
{
  imageUrl: 'https://i.vimeocdn.com/portfolio_header/566734',
}
{
imageUrl: 'https://i.vimeocdn.com/portfolio_header/566734',
}Button
You can add a button to the popup that will open chat.
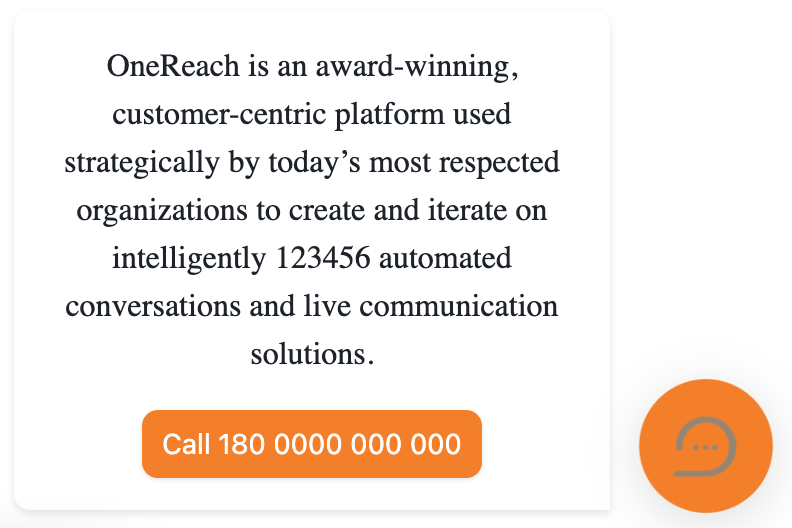
Initialization code for the invitation message button
Example:
js
{
  buttonLabel: 'Call 180 0000 000 000'
}
{
buttonLabel: 'Call 180 0000 000 000'
}Invitation message delay duration
It is the time that the popup waits to show itself. You can set the value for up to 10 minutes. Examples of acceptable time formats are 1m 12s or 72s.
Initialization code for the invitation message delay
You can modify the appearDelay prop in the init code of the embedded chat. The values must be in milliseconds. Write 72000 milliseconds 1m 12s, 15000 milliseconds instead of 15s.
Example:
js
{
  appearDelay: 5000
}
{
appearDelay: 5000
}Show x icon to close invitation message
The enabled setting allows the chat user to close the invitation message bubble by clicking x icon in the top right corner of the popup.
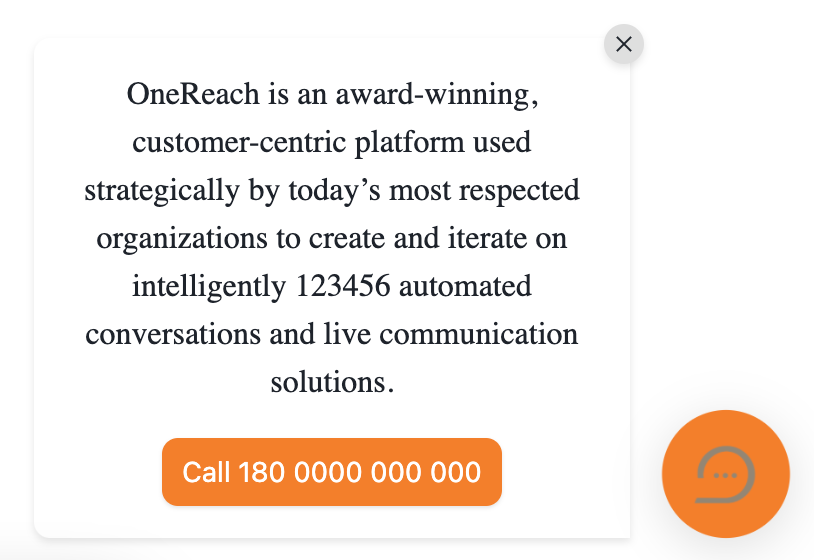
Initialization code for x icon to close the invitation message
Example:
js
{
  closeable: true, // show invitiation message close icon
  closeable: false // hide invitiation message close icon
}
{
closeable: true, // show invitiation message close icon
closeable: false // hide invitiation message close icon
}Window settings
Set up the view and behavior of the embedded chat window here.
Chat window auto-open delay duration
If you want the embedded chat window to open only when the user clicks on the embedded chat widget, set the value to 0 seconds. If you want the embedded chat window to auto-open on your webpage, set the value for the time pause duration. Once the time of this pause is out, the embedded chat window will automatically open on your webpage. Maximum value is 10 minutes. By default, for overlay and sidebar embedded styles, the chat window will open 15 seconds after the chat user opens the website. Examples of acceptable time formats: 1m 12s or 72s.
Initialization code for chat window auto-open delay duration:
js
widget: {
  openDelay: 15000,
},widget: {
openDelay: 15000,
},You can modify the openDelay prop in the init code of the embedded chat. The values must be in milliseconds. Write 72000 milliseconds 1m 12s, 15000 milliseconds instead of 15s.
Preload chat in background
Serves to eliminate user waiting time when they open the embedded chat. Enable the toggle to load the chat and receive the first bot's message in the background of the page without showing these processes to the user. When they are complete, the chat widget appears on the page. Once the user clicks on the widget, they see the loaded chat with the first bot's message. The user can start communication in the chat on the spot. No waiting is needed.
Allow to change chat window size
In the mobile and Apps views of the chat, the Resize to fullscreen button is added on the left side of the chat window. When the chat is expanded to fullscreen the user can resize it back.
In the desktop view of the chat, the user can resize the embedded chat window with four resizers in its corners. They are highlighted for demonstration in the following print screen:
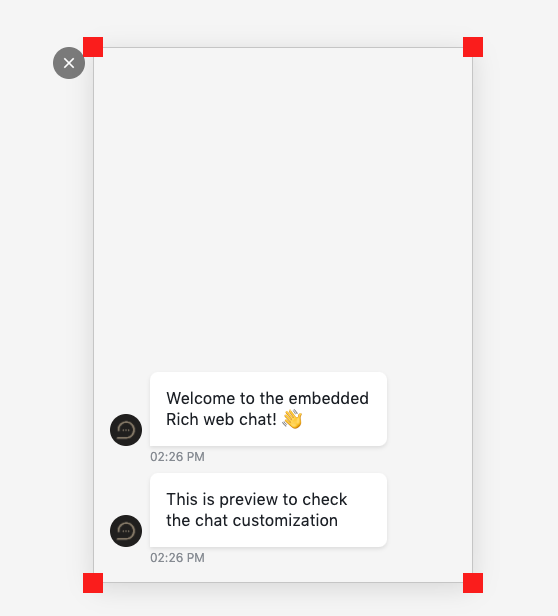
By default, resizers are invisible:
Initialization code for embedded chat window resize
js
appearance: {
  resizeable: false,
},appearance: {
resizeable: false,
},Allow to drag chat window
Allows to drag chat window within the browser window area.
By default, the drag zone of the chat window is invisible. It is highlighted for demonstration in the following print screen:
Initialization code for chat window dragging
js
appearance: {
  draggable: true,
},appearance: {
draggable: true,
},Apply blurred background
Enable to blur the background of the chat window. The effect is the same for both Light and Dark modes. On chat window resize or screen position change, background blur will remain.
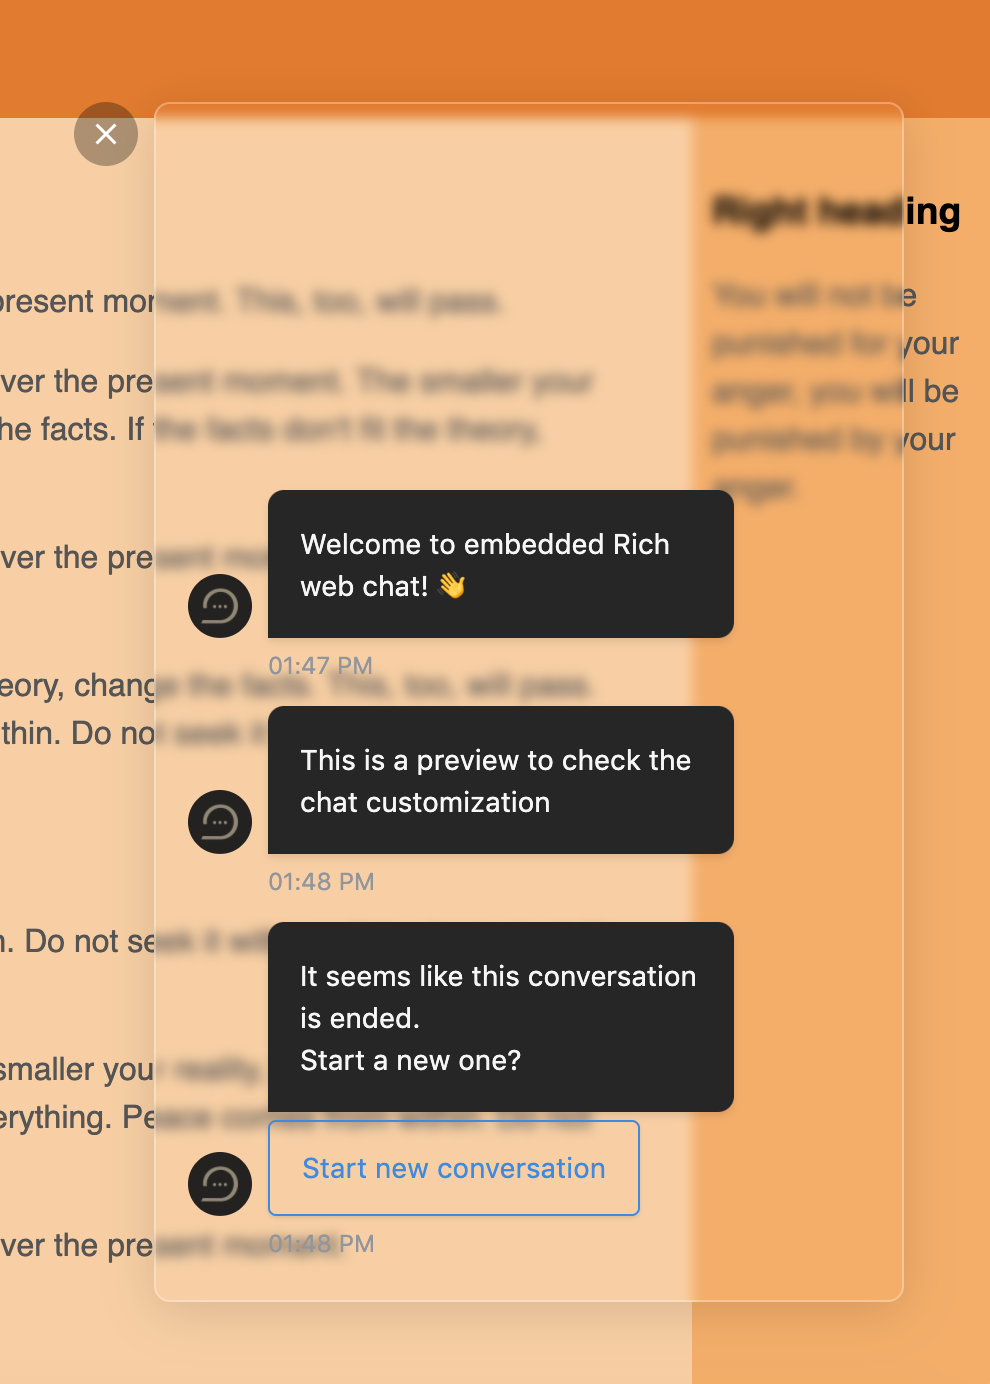
WARNING
Blurred background is not applicable for Firefox browser 90.0.2 (64-bit).
Initialization code for blurred background
js
appearance: {
  blurredBackground: false,
},appearance: {
blurredBackground: false,
},Preview settings
You can test how the widget will look on your website by adding a website URL to the Preview webpage URL field and clicking the Preview embedded chat button in the Step.
How to embed chat with code snippet
Find a basic tutorial in the Embed your RWC into a web page quick-start article.
To embed Rich Web Chat to your website:
- Import the RWC script & CSS styles into the
<head>section of your webpage.
html
<!-- In <head> add scripts and styles to your html page -->
<script src="https://chat.staging.onereach.ai/lib/richWebChat.umd.min.js"></script>
<link rel="stylesheet" href="https://chat.staging.onereach.ai/lib/richWebChat.css"/>
<!-- In <head> add scripts and styles to your html page -->
<script src="https://chat.staging.onereach.ai/lib/richWebChat.umd.min.js"></script>
<link rel="stylesheet" href="https://chat.staging.onereach.ai/lib/richWebChat.css"/>- Add the code below in the
<body>section of your webpage. This will be the container where RWC will be rendered.
html
<!-- insert code below into <body> -->
<div id="rwc"></div>
<!-- insert code below into <body> -->
<div id="rwc"></div>- The last step is RWC chat initialization. Put this script in
<head>or<body>section of your webpage but after scripts & styles imports. This code will initialize RWC chat into the container.
TIP
Note, that container prop should be the same as container ID, in our case container ID is the rwc.
html
<script>

  document.addEventListener("DOMContentLoaded", function () {
    var RWC = richWebChat.default
    if (app) { app.destroy(); }
    var app = new RWC({
      container: '#rwc', // DOM element selector where chat will be inserted
      chatUrl: 'http://localhost:8090/XSA15G2jQoCLGYM3SS1yEA/development', // url of your chat. required

      appearance: {
        blurredBackground: false,
        resizeable: false,
        draggable: false,
        saveChatSize: true,
        styles: [
          'link_to_css_file'
        ]
      },

      widget: {
        position: 'bottom-right',
        animation: 'zoom',
        color: 'red',
        logoUrl: 'https://i.pinimg.com/originals/8e/a0/bc/8ea0bcfd33f66a3a9d49bc4dd13338b5.gif',
        revealDelay: 0,
        openDelay: 0,
      },

      invitation: {
        closeable: true,
        imageUrl: 'https://i.pinimg.com/originals/8e/a0/bc/8ea0bcfd33f66a3a9d49bc4dd13338b5.gif',
        message: 'Hello?',
        buttonLabel: 'Open chat',
        appearDelay: 2000
      },

      pageData: {
        fname: 'foo'
      }
    })
  });
</script><script>
document.addEventListener("DOMContentLoaded", function () {
var RWC = richWebChat.default
if (app) { app.destroy(); }
var app = new RWC({
container: '#rwc', // DOM element selector where chat will be inserted
chatUrl: 'http://localhost:8090/XSA15G2jQoCLGYM3SS1yEA/development', // url of your chat. required
appearance: {
blurredBackground: false,
resizeable: false,
draggable: false,
saveChatSize: true,
styles: [
'link_to_css_file'
]
},
widget: {
position: 'bottom-right',
animation: 'zoom',
color: 'red',
logoUrl: 'https://i.pinimg.com/originals/8e/a0/bc/8ea0bcfd33f66a3a9d49bc4dd13338b5.gif',
revealDelay: 0,
openDelay: 0,
},
invitation: {
closeable: true,
imageUrl: 'https://i.pinimg.com/originals/8e/a0/bc/8ea0bcfd33f66a3a9d49bc4dd13338b5.gif',
message: 'Hello?',
buttonLabel: 'Open chat',
appearDelay: 2000
},
pageData: {
fname: 'foo'
}
})
});
</script>Props for embedded chat
| Embedded chat property | Data type | Details |
|---|---|---|
container | String | Required prop. DOM element selector where the chat will be inserted. |
chatUrl | String | Required prop. The URL of your chat. You can find it in the Wait for Chat (RWC) Step, its General settings section, in the RWC URL field. Note, that it becomes available after the first activation of the chat Flow. |
autoExpandDelay | Number | |
position | String | Initialization code for the widget location |
inviteMessage | String | Initialization code for the invitation message |
inviteButton | String | Initialization code for the invitation message button |
inviteImage | String | Initialization code for the invitation message image |
showCloseIcon | Boolean | Initialization code for x icon to close the invitation message |
inviteTimeout | Number | Initialization code for the invitation message delay |
widgetColor | String | Initialization code for the widget icon and color |
allowChangeChatWindowSize | Boolean | Initialization code for embedded chat window resize |
allowDrag | Boolean | Initialization code for chat window dragging |
thumbLogo | String | |
animation | String | Initialization code for the widget icon animation |
pageData | Object | Custom object that will be passed to the Flow. |
Passing custom data to flow using pageData prop
In the embedded chat snippet, you can pass any data to the Flow by specifying properties in pageData object.
js
pageData: {
    firstName: 'John',
    lastName: 'Doe'
}pageData: {
firstName: 'John',
lastName: 'Doe'
}All data will be available in the Wait for Chat (RWC) Step Merge field as a pageData property.
js
await this.mergeFields['<wait for chat mergefield name>'].get({path: 'pageData.firstName'}); // John
await this.mergeFields['<wait for chat mergefield name>'].get({path: 'pageData.lastName'}); // Doeawait this.mergeFields['<wait for chat mergefield name>'].get({path: 'pageData.firstName'}); // John
await this.mergeFields['<wait for chat mergefield name>'].get({path: 'pageData.lastName'}); // DoeFind a full example of passing props to Flow in the Pass custom data to Flow article.
Full page example with embedded chat
html
<!DOCTYPE html>
<html lang="en">
<head>
<meta charset="UTF-8">
<title>Webpage Title</title>
<meta name="viewport"
content="width=device-width, height=device-height, user-scalable=no, initial-scale=1.0, minimum-scale=1.0, maximum-scale=1.0, viewport-fit=cover">
<meta charset="utf-8" />
<script src="https://chat.staging.onereach.ai/lib/richWebChat.umd.min.js"></script>
<link rel="stylesheet" href="https://chat.staging.onereach.ai/lib/richWebChat.css"/>
</head>
<body>
<div id="rwc"></div>
<script>
document.addEventListener("DOMContentLoaded", function () {
var RWC = richWebChat.default
var app
if (app) { app.destroy(); }
var app = new RWC({
container: '#rwc', // DOM element selector where chat will be inserted
chatUrl: '', // url of your chat. required
autoExpandDelay: 15000,
position: 'bottom-right',
inviteMessage: "OneReach is an award-winning, customer-centric platform used strategically by today’s most respected organizations to create and iterate on intelligently 123456 automated conversations and live communication solutions.",
inviteButton: "Call 180 0000 000 000",
inviteImage: 'https://i.vimeocdn.com/portfolio_header/566734',
showCloseIcon: true,
inviteTimeout: 5000,
widgetColor: '#F57F17',
allowChangeChatWindowSize: true,
allowDrag: true,
thumbLogo: undefined,
animation: 'zoom', // 'pulse', 'ring', 'zoom',
pageData: {
    firstName: 'John',
    lastName: 'Doe'
}
});
});
</script>
</body>
</html><!DOCTYPE html>
<html lang="en">
<head>
<meta charset="UTF-8">
<title>Webpage Title</title>
<meta name="viewport"
content="width=device-width, height=device-height, user-scalable=no, initial-scale=1.0, minimum-scale=1.0, maximum-scale=1.0, viewport-fit=cover">
<meta charset="utf-8" />
<script src="https://chat.staging.onereach.ai/lib/richWebChat.umd.min.js"></script>
<link rel="stylesheet" href="https://chat.staging.onereach.ai/lib/richWebChat.css"/>
</head>
<body>
<div id="rwc"></div>
<script>
document.addEventListener("DOMContentLoaded", function () {
var RWC = richWebChat.default
var app
if (app) { app.destroy(); }
var app = new RWC({
container: '#rwc', // DOM element selector where chat will be inserted
chatUrl: '', // url of your chat. required
autoExpandDelay: 15000,
position: 'bottom-right',
inviteMessage: "OneReach is an award-winning, customer-centric platform used strategically by today’s most respected organizations to create and iterate on intelligently 123456 automated conversations and live communication solutions.",
inviteButton: "Call 180 0000 000 000",
inviteImage: 'https://i.vimeocdn.com/portfolio_header/566734',
showCloseIcon: true,
inviteTimeout: 5000,
widgetColor: '#F57F17',
allowChangeChatWindowSize: true,
allowDrag: true,
thumbLogo: undefined,
animation: 'zoom', // 'pulse', 'ring', 'zoom',
pageData: {
firstName: 'John',
lastName: 'Doe'
}
});
});
</script>
</body>
</html>Advanced settings
Use custom css
Enable the toggle and choose the file(s) with CSS for your chat via the Files storage or provide it as a link using http:// or https://. To use a CSS file stored in an external cloud service, you need to indicate the link for downloading that file.
TIP
You can access default chat CSS variables to adapt for both Light and Dark modes.
Color variables
css
--c-primary: rgb(23, 138, 231);
--c-milk: rgb(233, 233, 233);
--c-silver: #dfdfdf;
--c-light-grey: #f6f6f6;
--c-dark-grey: #91969d;
--c-white: #fff;
--c-black: #1e232b;
--c-coal: #262626;
--с-light-coal: #353535;
--c-dark: #161616;
--c-zero: #000;
--c-zero-01: rgba(0, 0, 0, 0.1); // due to safari issue
--c-zero-015: rgba(0, 0, 0, 0.15);
--c-white-025: rgba(255, 255, 255, 0.25);
--textColor: var(--c-black);
--textColorInvert: var(--c-white);
--bodyBackground: var(--c-light-grey);
--messageBackground: var(--c-white);
--shadowColor: var(--c-zero-01);
--timeColor: var(--c-dark-grey);
--rwcTheme: var(--c-primary);
--sliderRailColor: var(--c-milk);
--borderColor: var(--c-silver);
--pickerBackground: var(--c-light-grey);
--pickerTogglerColor: var(--c-dark-grey);
--pickerTogglerActiveColor: var(--c-black);
--dateToday: var(--c-light-grey);
--headerBorderColor: var(--c-zero-015);
--fileItemBackground: var(--c-light-grey);
--c-primary: rgb(23, 138, 231);
--c-milk: rgb(233, 233, 233);
--c-silver: #dfdfdf;
--c-light-grey: #f6f6f6;
--c-dark-grey: #91969d;
--c-white: #fff;
--c-black: #1e232b;
--c-coal: #262626;
--с-light-coal: #353535;
--c-dark: #161616;
--c-zero: #000;
--c-zero-01: rgba(0, 0, 0, 0.1); // due to safari issue
--c-zero-015: rgba(0, 0, 0, 0.15);
--c-white-025: rgba(255, 255, 255, 0.25);
--textColor: var(--c-black);
--textColorInvert: var(--c-white);
--bodyBackground: var(--c-light-grey);
--messageBackground: var(--c-white);
--shadowColor: var(--c-zero-01);
--timeColor: var(--c-dark-grey);
--rwcTheme: var(--c-primary);
--sliderRailColor: var(--c-milk);
--borderColor: var(--c-silver);
--pickerBackground: var(--c-light-grey);
--pickerTogglerColor: var(--c-dark-grey);
--pickerTogglerActiveColor: var(--c-black);
--dateToday: var(--c-light-grey);
--headerBorderColor: var(--c-zero-015);
--fileItemBackground: var(--c-light-grey);Dark mode
In dark mode, some variables will change color.
css
--textColor: var(--c-light-grey);
--messageBackground: var(--c-coal);
--bodyBackground: var(--c-dark);
--sliderRailColor: var(--с-light-coal);
--borderColor: var(--c-light-coal);
--pickerBackground: var(--c-coal);
--pickerTogglerColor: var(--c-dark-grey);
--pickerTogglerActiveColor: var(--c-white);
--dateToday: var(--c-dark-grey);
--headerBorderColor: var(--c-white-025);
--fileItemBackground: var(--с-light-coal);
--textColor: var(--c-light-grey);
--messageBackground: var(--c-coal);
--bodyBackground: var(--c-dark);
--sliderRailColor: var(--с-light-coal);
--borderColor: var(--c-light-coal);
--pickerBackground: var(--c-coal);
--pickerTogglerColor: var(--c-dark-grey);
--pickerTogglerActiveColor: var(--c-white);
--dateToday: var(--c-dark-grey);
--headerBorderColor: var(--c-white-025);
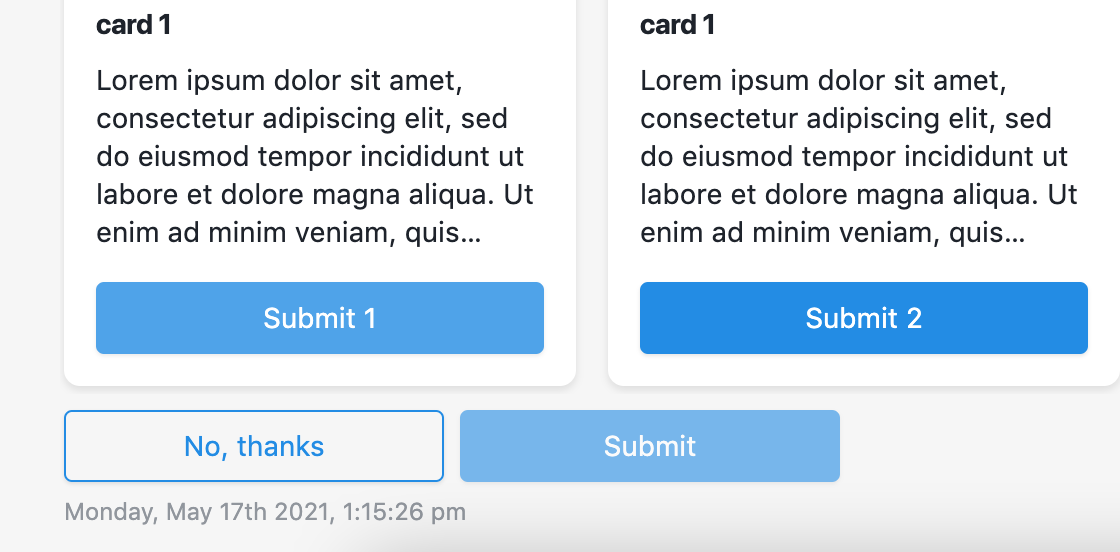
--fileItemBackground: var(--с-light-coal);Use custom message time format
The setting changes the time format of chat messages. Takes a string of tokens and replaces them with their corresponding date/time values.
For example:
hh:mm A->01:10 PMdefaultdddd, MMMM Do YYYY, h:mm:ss a->Monday, May 17th 2021, 1:11:51 pmddd, hA->Mon, 1PM
TIP
For additional information about time formatting visit Moment JS Date Format documentation page.
Customize header
Allows to add custom styles and scripts for the chat header or completely change its appearance.
TIP
If you leave the HTML field empty, the chat will have a default header that can be set in the Chat title, Chat description fields, and the Header logo input of the Chat appearance section of the Wait for Chat (RWC).
TIP
CSS styles for header also can be specified when using Custom CSS.
TIP
Header JavaScript code will be appended right before </body> tag and executed after the chat was loaded and before the footer JavaScript code.
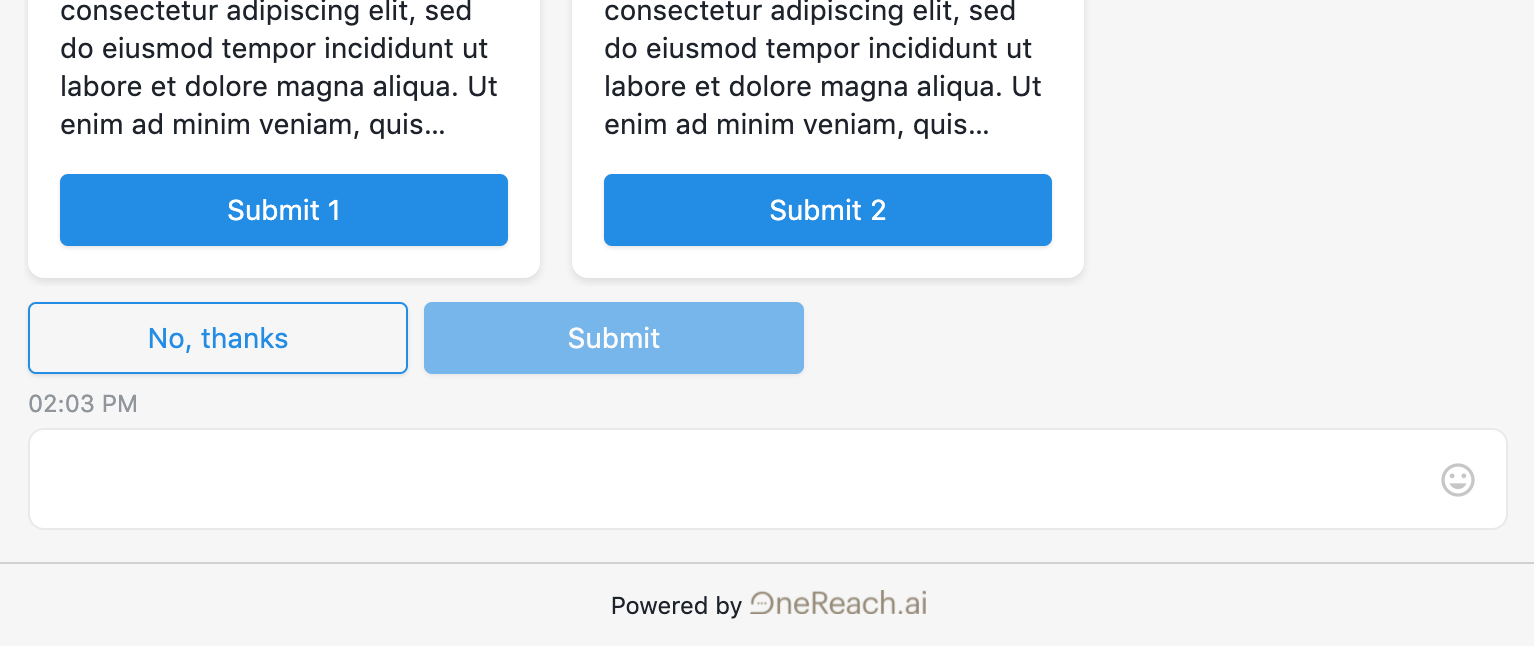
Customize footer
Allows to add a custom footer for the chat.
TIP
CSS styles for the footer also can be specified when using Custom CSS.
TIP
Footer JavaScript code will be appended right before </body> tag and executed after the chat was loaded, but after header JavaScript.
Show footer at
Allows to hide the footer depending on the chat user's device.
- Desktop - show footer in Desktop devices or devices with large resolution;
- Mobile - show footer on mobile devices or devices with small resolution;
- Embed - show footer in embedded chat.
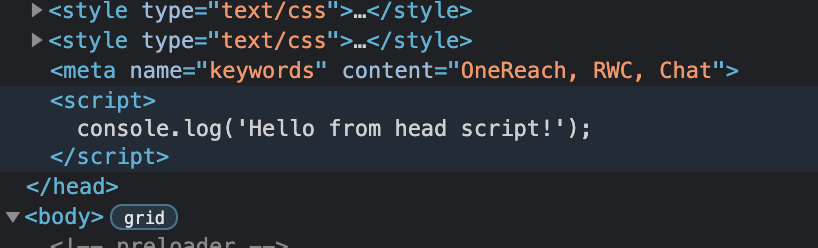
Extend page <head> by custom template
Enable to inject custom scripts or meta tags into the <head> tag of the chat page.
For example:
HTML
<meta name="keywords" content="OneReach, RWC, Chat">
<script>
  console.log('Hello from head script!');
</script><meta name="keywords" content="OneReach, RWC, Chat">
<script>
console.log('Hello from head script!');
</script>Will append script with console.log and meta tag to <head>:
TIP
If the template has JavaScript code, it will be executed after header & footer Javascript code.
Add merge field variable from client
Allows to specify a list of custom variables that will be added to the customVariables Merge field data of this Step.
Variable name- JavaScript variable name that will be added to Merge field data;Value from script execution- JavaScript code that will be executed when the user opens the chat (in the client browser). Should return value.
The expression in Value from script execution will be evaluated in the client browser and the value will be passed into the flow. After that Wait for Chat (RWC) Merge field will have this value in <mergefield name>.customVariables.yourVariableName.
Example:
Add variable
loadTimestampand function that returns current timestampreturn Date.now()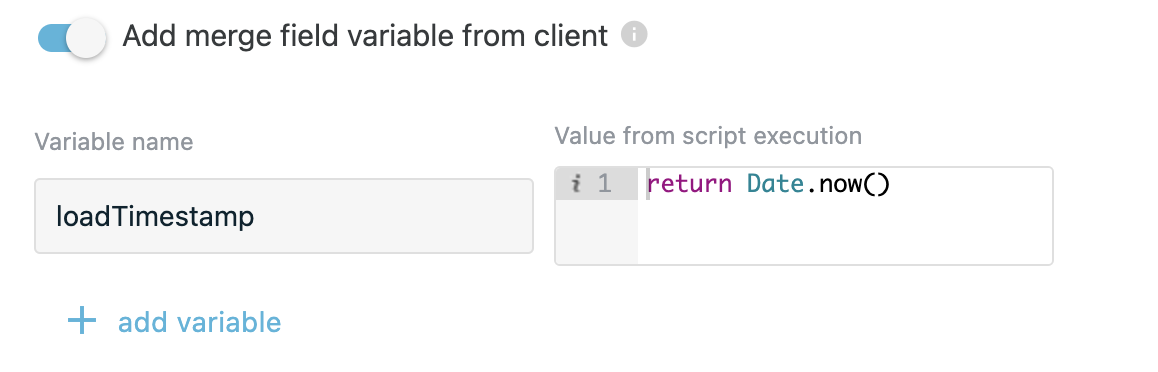
Use Step Merge field variable in another Step
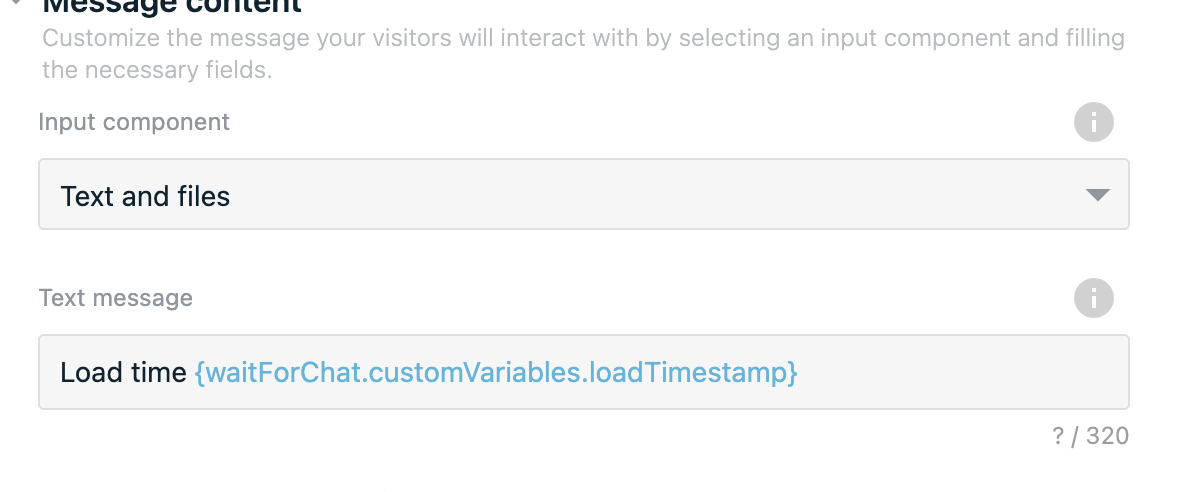
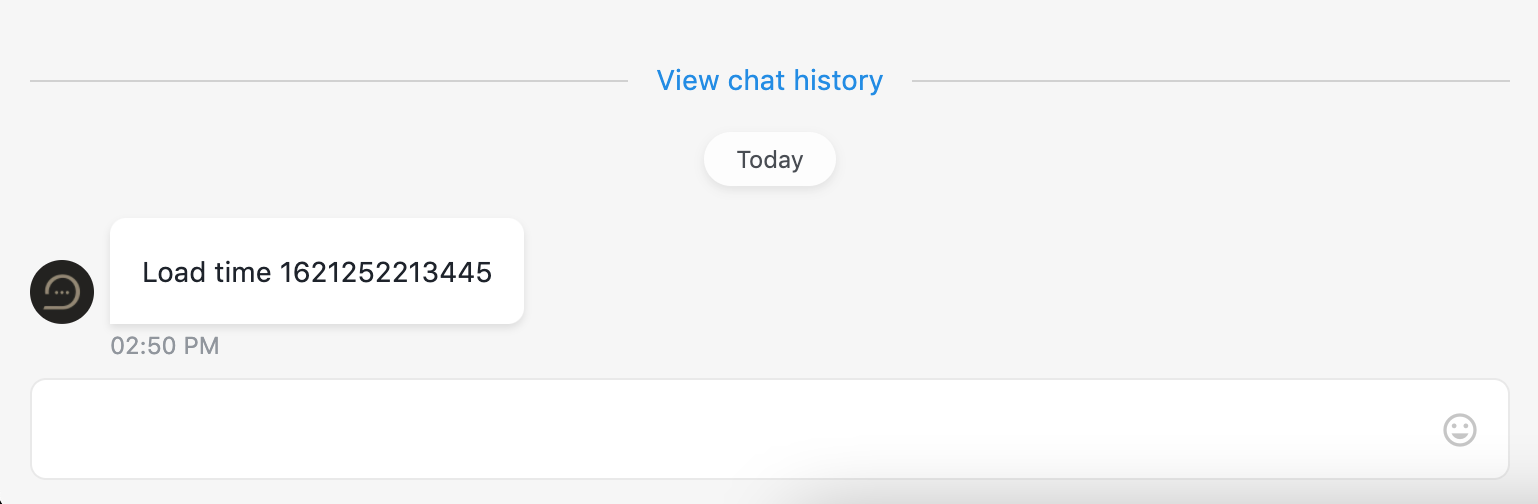
Result: message with timestamp that was executed when user opened chat
Allow user to edit their last reply
Find details in the Allow user to edit their last reply article.
Merge field variables and settings
The output data of the Step will be stored under the name provided in the Merge field name. The following properties are returned: the chat URL, the ID of the current session, the bot answer delay duration and the information about visitor’s device and browser, as well as additional query parameters and headers of the request. See below the structure of the merge field object:
json
{
   "answerDelay":"String",
   "appId":"String",
   "browserFingerprint":"String",
   "context":"Object",
   "customVariables":"Object",
   "deviceId":"String",
   "headers":"Object",
   "language":"String",
   "pageData":"Object",
   "queryParams":"Object",
   "rwcUrl":"String",
   "sessionId":"String",
   "userIP":"String",
   "userTimezone":{
            "offset":"Number",
            "name":"String"
 }
{
"answerDelay":"String",
"appId":"String",
"browserFingerprint":"String",
"context":"Object",
"customVariables":"Object",
"deviceId":"String",
"headers":"Object",
"language":"String",
"pageData":"Object",
"queryParams":"Object",
"rwcUrl":"String",
"sessionId":"String",
"userIP":"String",
"userTimezone":{
"offset":"Number",
"name":"String"
}Description:
answerDelay- bot answer delay duration.
Example: 2 secondsappId- OneReach.ai Apps identificatior. The same value is returned if the chat opened in browser, apps, embedded views.
Emample: wgp3zpnqss-k7ritsrlhyq.apps.staging.onereach.aibrowserFingerprint- unique hash to recognize a particular end-user based on user's browser, settings, OS.
Example: b39d51626afc98dbce88275f22e36f24context- data, that might be sent with in-app notification with step template Send Notification (Apps).customVariables- variables defined in Extend page<head>by custom template section.
Example:
js
{
  customVariable: 'some value',
  customNumber: 123456789
}
{
customVariable: 'some value',
customNumber: 123456789
}deviceId- variable has value only when chat opened within OneReach.ai Apps application. If chat opened in browser or embedded view, deviceId will beundefined. Value is the same for all chats, added in OneReach.ai Apps within a device. If app was reinstalled, deviceId will be changed.
Example: VByfKmz-TE2wsfkoAjwvIwheaders- HTTP response headers, that are included with the data being sent back to the client to instruct the browser to do something or for informational purposes.
Example:
json
{
   "cache-control": "no-cache",
   "content-length": "1681",
   "content-type": "application/json; charset=utf-8"
}
{
"cache-control": "no-cache",
"content-length": "1681",
"content-type": "application/json; charset=utf-8"
}language- Find details in Merge field for chat language acticle.
pageData- Find details in Passing custom data to Flow using pagedata prop section.queryParams- defined set of parameters, added to the end of a url in format?a=1&b=2. If added, it will be stored in merge field as objects array.
Example:
json
{
   "a": "1",
   "b": "2"
}
{
"a": "1",
"b": "2"
}rwcURL- full RWC URL.
Example: https://chat.staging.onereach.ai/IHWZ7wApT4qVlTr9cdFTkg/0z4xmz7sessionId- uuid of a main RWC flow (beginningSessionId).
Example: 57a73403-2e70-4fcd-bb39-5bfbed6eefeb
userIP- for example, you can use it to spot the chat user's location and greet them according to their time zone or suggest close delivery pickup spots, etc.
userTimezone- timezone of the user that opened chat.
Example:
js
{
  offset: '+3',
  name: 'Europe/Kiev'
}
{
offset: '+3',
name: 'Europe/Kiev'
}Reporting
Find details in the Reporting events article.